Mounting discs and block holders in the blank magazine
The workflow for restoration is as follows:
→
→
→
→
Operating the blank changer
You can mount up to 10 blanks to the magazine slots of the blank changer![]() Machine component which stores multiple blanks in a magazine and which can automatically load them into the working chamber.. When using the search, use a blank changer or a blank magazine instead. The machine automatically loads blanks into the working chamber when they are required for the next job. This allows you to process up to 10 jobs in succession without having to start each job manually.
Machine component which stores multiple blanks in a magazine and which can automatically load them into the working chamber.. When using the search, use a blank changer or a blank magazine instead. The machine automatically loads blanks into the working chamber when they are required for the next job. This allows you to process up to 10 jobs in succession without having to start each job manually.
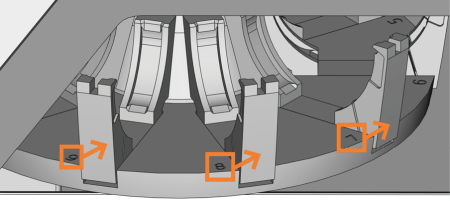
To the left of each blank magazine![]() Part of the blank changer in which you store the blanks for automatic loading. slot is a laser engraved number (marked orange) that labels the corresponding slot.
Part of the blank changer in which you store the blanks for automatic loading. slot is a laser engraved number (marked orange) that labels the corresponding slot.
- The blank types in the physical slots must correspond to the blank types which are assigned to the virtual blank magazines
 Part of the blank changer in which you store the blanks for automatic loading. in DentalCNC.
 - To move the blank magazine
 Part of the blank changer in which you store the blanks for automatic loading. or to manually load blanks into the working chamber, use the Machining view in DentalCNC.
How to manually operate the blank changer![]() Machine component which stores multiple blanks in a magazine and which can automatically load them into the working chamber.. When using the search, use a blank changer or a blank magazine instead and how to assign jobs to blank magazine
Machine component which stores multiple blanks in a magazine and which can automatically load them into the working chamber.. When using the search, use a blank changer or a blank magazine instead and how to assign jobs to blank magazine![]() Part of the blank changer in which you store the blanks for automatic loading. slots is described in the documentation for DentalCNC.
Part of the blank changer in which you store the blanks for automatic loading. slots is described in the documentation for DentalCNC.
Change position of the blank magazine
NOTICE! When you mount blanks to a blank magazine![]() Part of the blank changer in which you store the blanks for automatic loading. slot, you must use the change position. Otherwise, the blanks in your machine will not correspond to the blank positions assigned in DentalCNC. The machine may load the wrong blanks, which can result in unusable machining results and broken tools.
Part of the blank changer in which you store the blanks for automatic loading. slot, you must use the change position. Otherwise, the blanks in your machine will not correspond to the blank positions assigned in DentalCNC. The machine may load the wrong blanks, which can result in unusable machining results and broken tools.
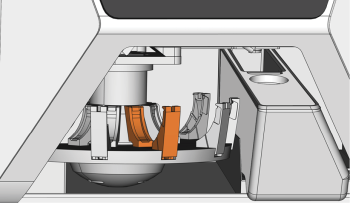
The change position (marked orange) is shown in the following figure:
Mounting blanks and block holders in the blank magazine
Damaging of the blank, block holder or fixing lever in case of improper handling
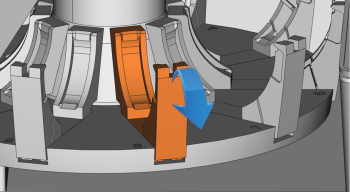
If you let the fixing lever snap against the blank or block holder, the fixing lever may damage the blank or block holder and/or the fixing lever may get damaged.
- Do not let the fixing lever snap against the blank or block holder.
- Slowly guide the fixing lever upwards against the blank or block holder.
You can mount blanks and block holders to the blank magazine![]() Part of the blank changer in which you store the blanks for automatic loading. while the machine is operating.
Part of the blank changer in which you store the blanks for automatic loading. while the machine is operating.
- Open the multi-purpose compartment.
- Move the desired blank magazine
 Part of the blank changer in which you store the blanks for automatic loading. slot into the change position via DentalCNC.
 - Pull the fixing lever downwards.
- Remove the blank in the blank magazine
 Part of the blank changer in which you store the blanks for automatic loading. slot if present.
- If you want to mount a disc of a height of 40 mm, make sure that the discs in the adjacent blank magazine
 Part of the blank changer in which you store the blanks for automatic loading. slots are of a maximum height of 25 mm. Otherwise, the disc will not fit properly into the blank magazine
 Part of the blank changer in which you store the blanks for automatic loading..
 - Correctly orientate the disc or block holder:
- Block holder: The numbers for the block positions 1 – 3 must be on top and the positioning aid of half-height must be in front.
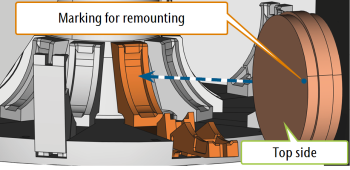
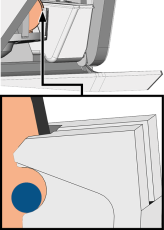
- Discs: If the disc has been marked for safer remounting via DentalCNC, make sure that the marking is in the position shown below.
- Insert the blank or block holder into the change position of the blank changer
 Machine component which stores multiple blanks in a magazine and which can automatically load them into the working chamber.. When using the search, use a blank changer or a blank magazine instead. Make sure that you position it fully upright and not in a slanted position. Otherwise, the loading process will fail.
 - Immobilize the blank or block holder by guiding the fixing lever against it.
- To ensure a proper seating, push the blank or block holder slightly downwards.
- Discs with marking for remounting; Position the marking at the lower edge of the recess in the fixing lever:
- The blank or block holder can be loaded into the working chamber.
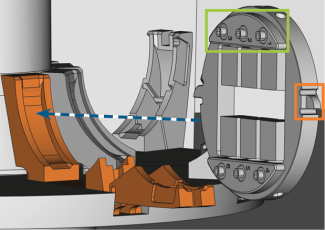
(a) Inserting a disc into the change position; (b) inserting a block holder into the change position (block positions 1 – 3 marked green, front positioning aid marked orange)
