Marking the matrix and patrix of attachments
This procedure does not belong to the simple nesting workflow.
- Position your objects horizontally and vertically in the top view.
- Rotate your objects about the Z-axis in the top view.
- Check if all cavities and drillings are correct.
- Specify the drilling range for objects with unrecognized drillings.
- Mark the cavities for objects with unrecognized cavities.
- Set bars for all objects.
This procedure belongs to step 11 of the complete nesting workflow.
- Delete any incorrect machined areas.
- Change the status of objects and delete non-required objects.
- Position your objects horizontally and vertically in the top view.
- Rotate your objects about the Z-axis in the top view.
- Adjust the height position of your objects and/or rotate them about the X/Y-axis (required for multilayered blanks).
- Check if all cavities and drillings are correct.
- Specify the drilling range for objects with unrecognized drillings.
- Mark the cavities for objects with unrecognized cavities.
- Create a sinter bar for objects that require a sinter bar.
- Set drops for objects that require drops.
- Mark the attachment for objects with an attachment.
- Activate anterior tooth editing for the desired object)
- Edit or delete labels milled on objects.
- Set bars for all objects.
The patrix and matrix of attachments must be marked manually for optimum editing. Optimum editing includes grinding repetitions and using activated optional tools.
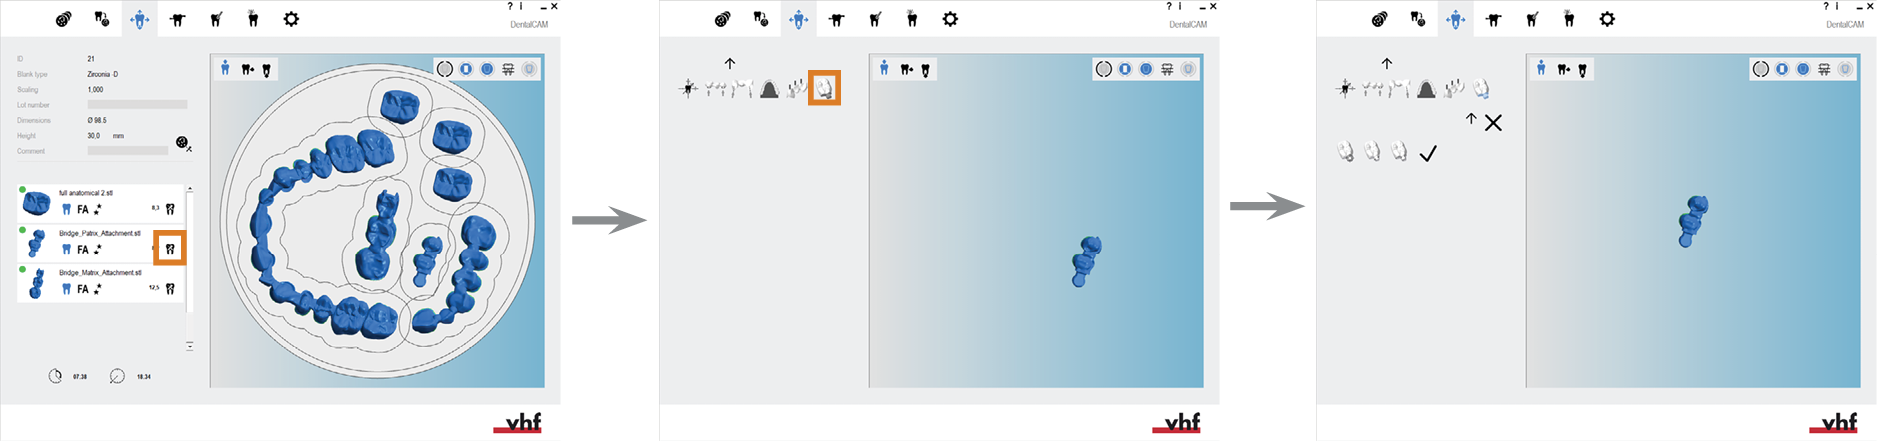
- Open the Nesting view for adjusting objects with the following icon in the main icon bar:

Marking attachments in the nesting view for adjusting objects
Preparing the marking of attachments
- Make sure that you have added both the object with the matrix and the object with the patrix to the blank.
- Prepare the objects:
-
(Optional) Select the desired object in the blank display.
-
dentalcam highlights the object in the object list with a colored border.
-
Open the editing functions for the required object with the following icon in the left column:

-
The icon bar for the editing functions is displayed.
-
Open the editing function for marking attachments with the following icon:

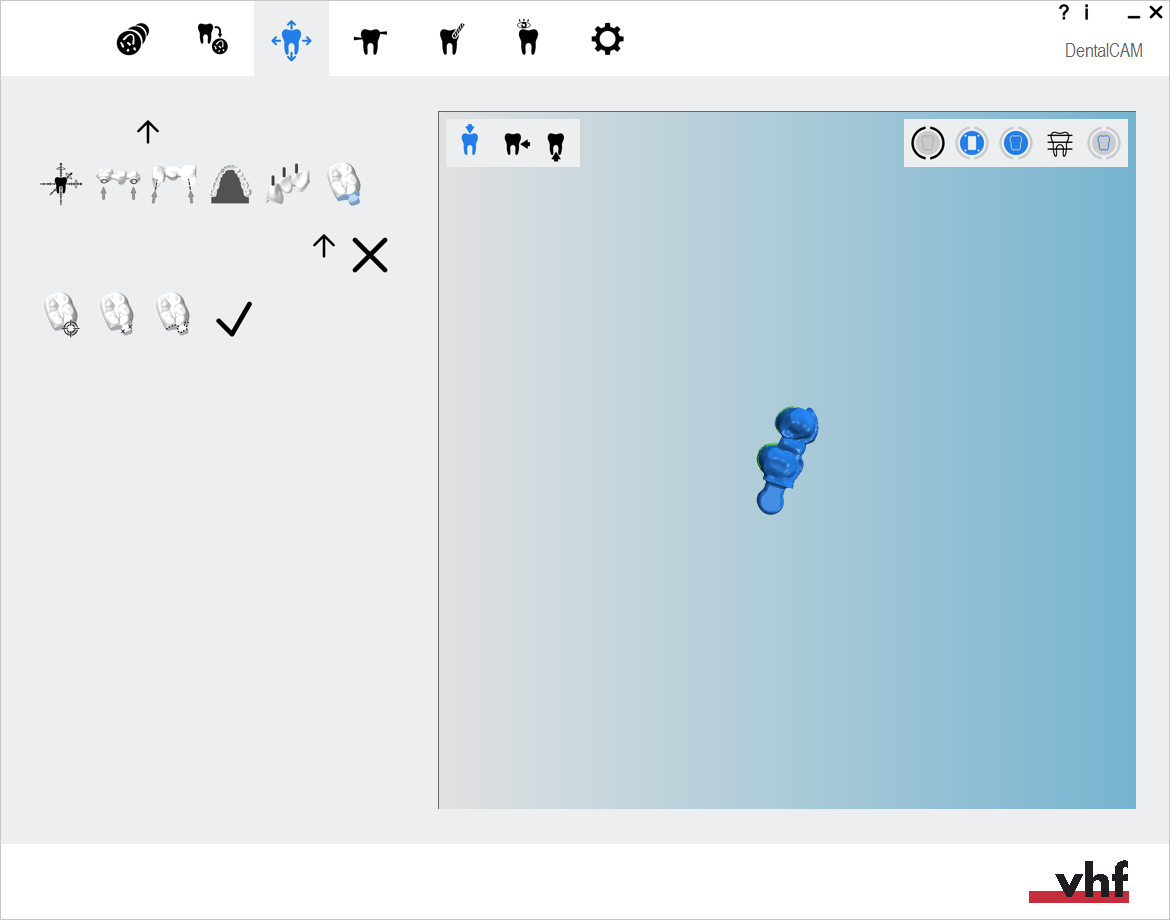
- In the left column, icons for marking the attachments display. In the blank display, dentalcam hides all elements except for the selected object.
- Icon for starting the workflow
- Icon for selecting reference points
- Icon for correcting the calculated shape of the attachment
- Icon for completing the workflow

Figure is an example
Opening the editing function for marking attachments (icons marked orange)
Marking the matrix
-
Start the workflow by selecting the following icon in the left column:

-
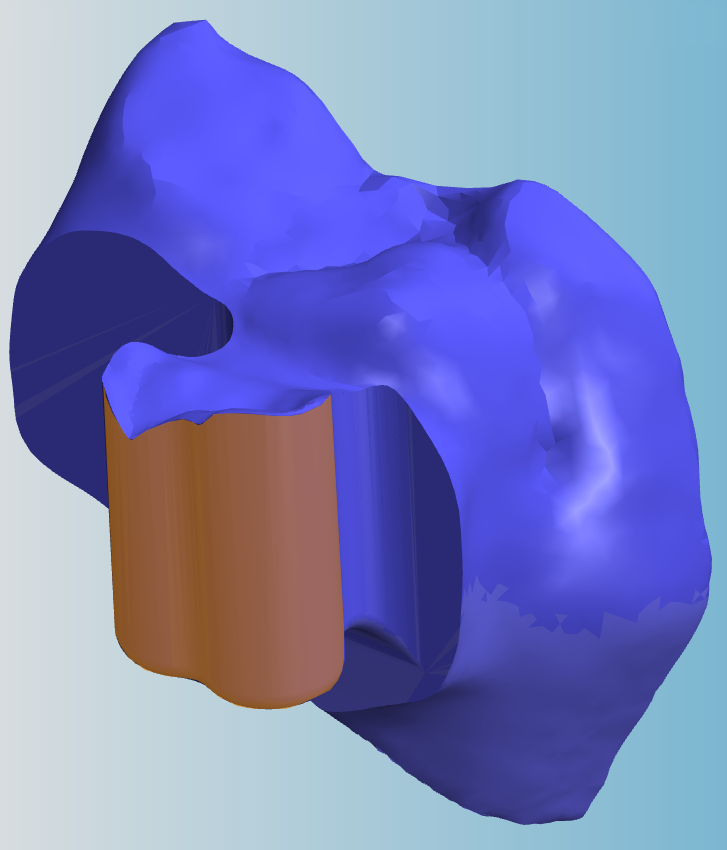
Position the view so that you are looking into the matrix from the insertion direction of the patrix.
-
Choose a steep angle.
-
You must be able to see a good portion of the inner contour of the matrix.
-
-
Continue by selecting the following icon in the left column:

-
Select 2 points on the part of the inner contour that runs parallel to the insertion direction of the patrix. Leave some space between the points.
-
The following happens:
- The blank display changes to top view.
- dentalcam calculates the shape of the attachment and marks it accordingly:
- Turquoise balls: The area is part of the attachment.
- Black balls: The area is not part of the attachment.
-
If necessary, correct the shape of the attachment.
-
Select a black sphere to extend the area to that sphere.
-
Select a turquoise ball to reduce the area to this ball.
Your goal is to mark an area with the turquoise balls that is slightly bigger than the attachment.
-
-
Finish the workflow by selecting the following icon in the left column:

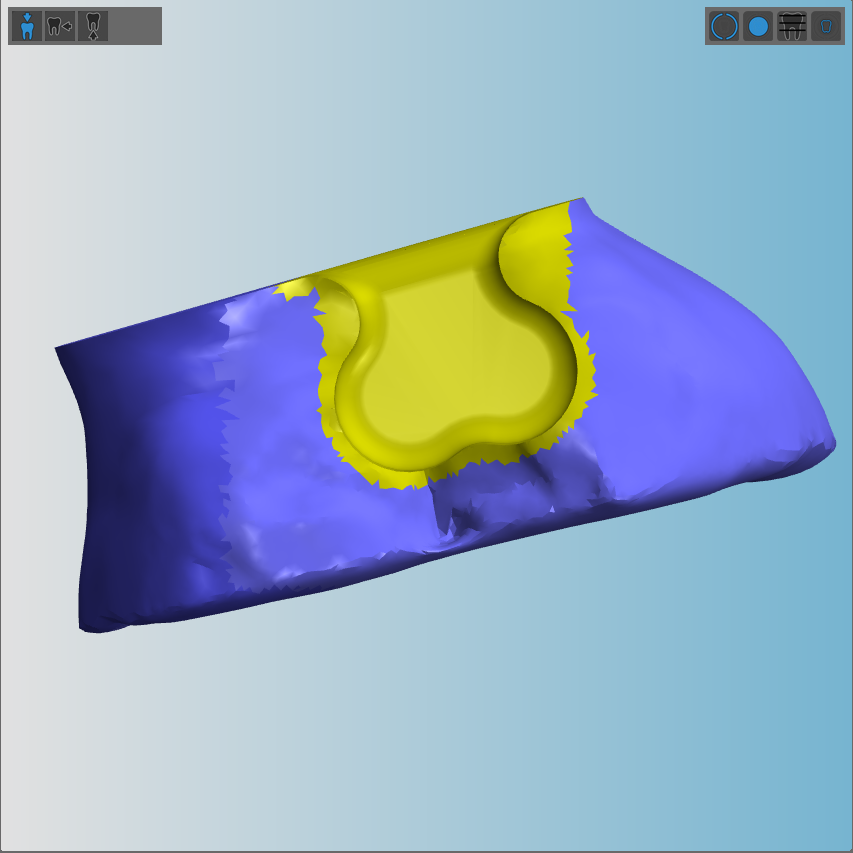
- The following happens:
- dentalcam re-calculates the shape of the attachment based on your input.
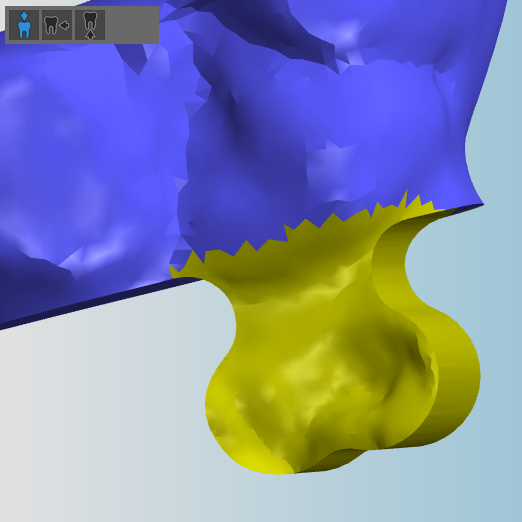
- When the calculation is finished, the attachment is marked in yellow.
-
Save your changes with the lower arrow icon:

-
Close the area for the editing function with the upper arrow icon:
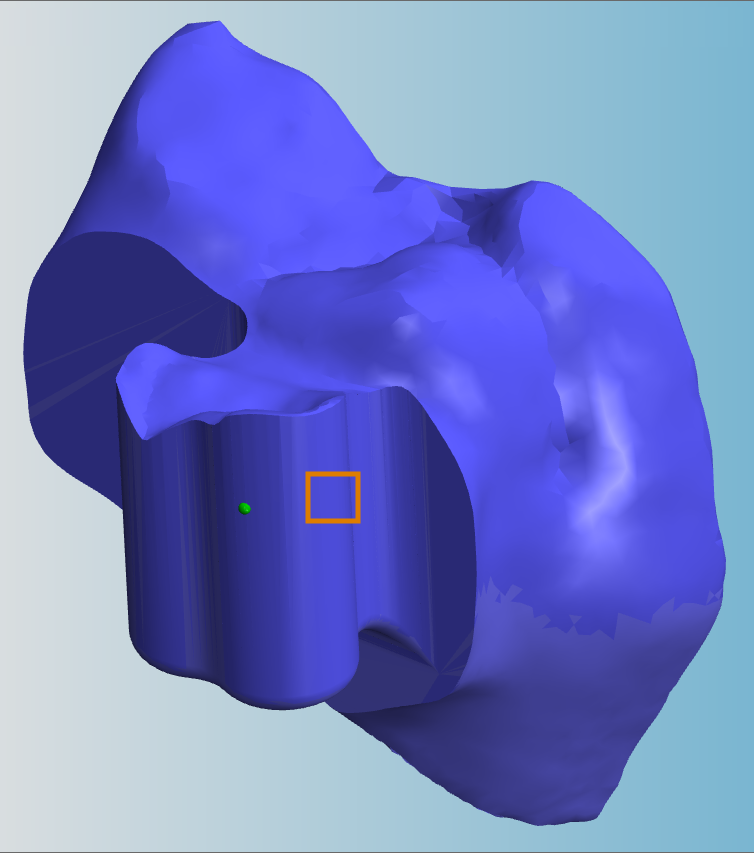
Example: Inner contour of the matrix is visible; insertion direction of the patrix is indicated by an arrow
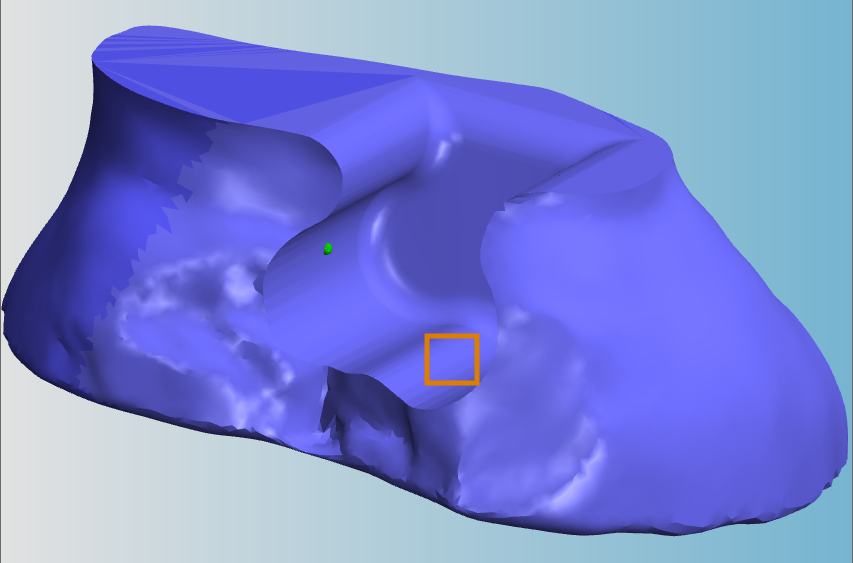
Example: The first point has been set, the second point still needs to be selected (possible location marked orange)
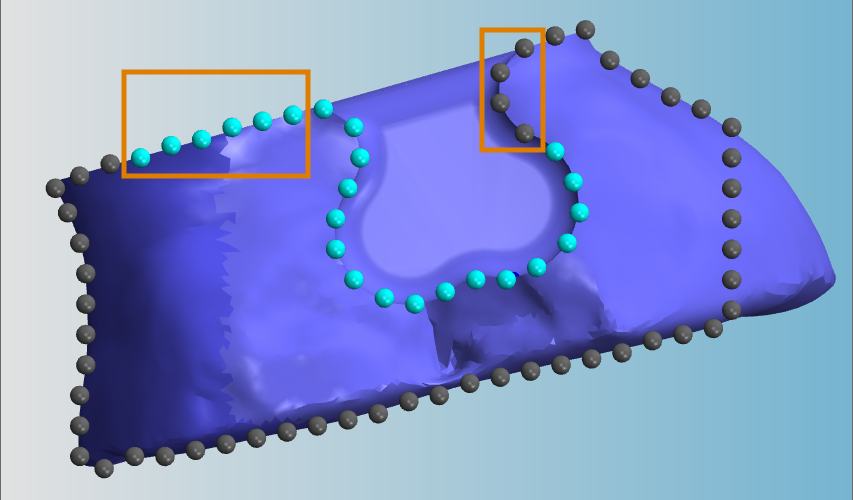
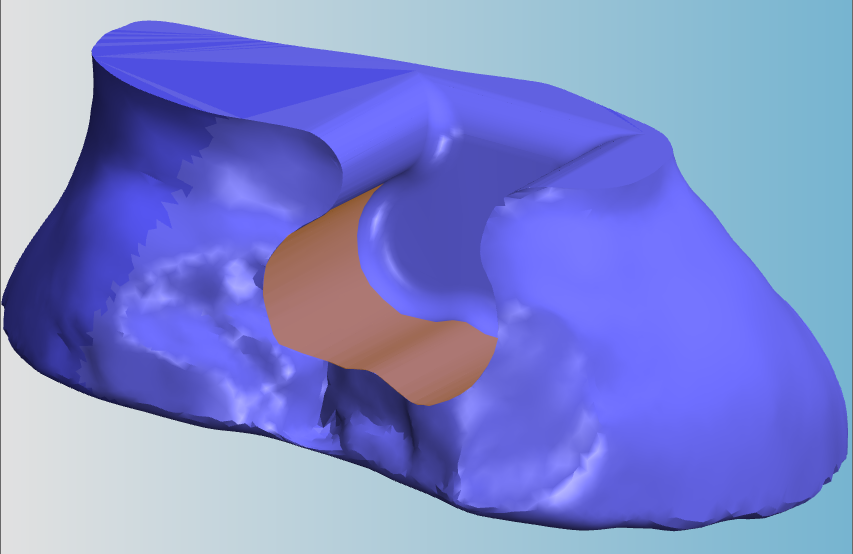
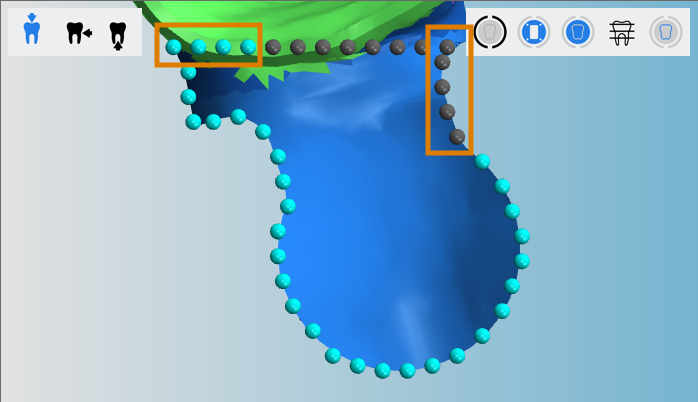
Example: Calculated contour of the attachment with errors (see orange markings)
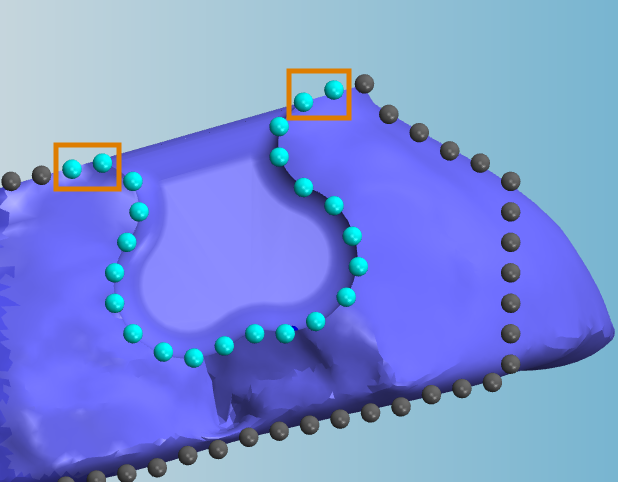
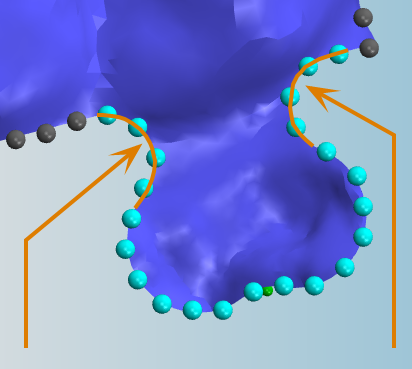
The marking of the contour has been corrected.
Marking the patrix
-
Start the workflow by selecting the following icon in the left column:
-
Move the view so that you can see a good portion of the contour of the patrix.
-
Continue by selecting the following icon in the left column:
-
Select 2 points on the contour of the patrix.
-
The following happens:
- The blank display changes to top view.
- dentalcam calculates the shape of the attachment and marks it accordingly:
- Turquoise balls: The area is part of the attachment.
- Black balls: The area is not part of the attachment.
-
If necessary, correct the shape of the attachment.
-
Select a black sphere to extend the area to that sphere.
-
Select a turquoise ball to reduce the area to this ball.
Make sure to also mark both radii at the sides of the attachment.
-
-
Finish the workflow by selecting the following icon in the left column:
- The following happens:
- dentalcam re-calculates the shape of the attachment based on your input.
- When the calculation is finished, the attachment is marked in yellow.
-
Save your changes with the lower arrow icon:
-
Close the area for the editing function with the upper arrow icon:
Example: Contour of the matrix is visible
Example: The first point has been set, the second point still needs to be selected (possible location marked orange)
Example: Calculated contour of the attachment with errors (see orange markings)
The marking of the contour has been corrected.
Removing the marking of attachments
-
(Optional) Select the desired object in the blank display.
-
dentalcam highlights the object in the object list with a colored border.
-
Open the editing functions for the required object with the following icon in the left column:
-
The icon bar for the editing functions is displayed.
-
Open the editing function for marking attachments with the following icon:
-
Select the following icon in the left column next to the label 1:

-
dentalcam deletes the marking of the attachment.
Figure is an example
What's next?
Next editing function for objects:
Using anterior tooth machining
If you are finished with adjusting objects:
If you are unsure whether you are finished nesting the current blank, see the simple and complete nesting workflow: