Marking and deleting cavities
This procedure belongs to step 5 of the simple nesting workflow.
- Position your objects horizontally and vertically in the top view.
- Rotate your objects about the Z-axis in the top view.
- Check if all cavities and drillings are correct.
- Specify the drilling range for objects with unrecognized drillings.
- Mark the cavities for objects with unrecognized cavities.
- Set bars for all objects.
This procedure belongs to step 8 of the complete nesting workflow.
- Delete any incorrect machined areas.
- Change the status of objects and delete non-required objects.
- Position your objects horizontally and vertically in the top view.
- Rotate your objects about the Z-axis in the top view.
- Adjust the height position of your objects and/or rotate them about the X/Y-axis (required for multilayered blanks).
- Check if all cavities and drillings are correct.
- Specify the drilling range for objects with unrecognized drillings.
- Mark the cavities for objects with unrecognized cavities.
- Create a sinter bar for objects that require a sinter bar.
- Set drops for objects that require drops.
- Mark the attachment for objects with an attachment.
- Activate anterior tooth editing for the desired object)
- Edit or delete labels milled on objects.
- Set bars for all objects.
Cavities must be marked for optimum editing. Optimum editing includes grinding repetitions and using optional tools. Incorrectly marked and unmarked cavities must be marked manually with the editing function for cavities.
- Open the Nesting view for adjusting objects with the following icon in the main icon bar:

-
Check all cavities of all objects in your blank for proper marking. Checking drilling ranges and cavities for proper marking
Deleting and marking cavities in the nesting view for adjusting objects
Watch the video

YouTube video – When viewing this video, personal data is sent to YouTube, LLC, USA. Privacy statement
Marking cavities
-
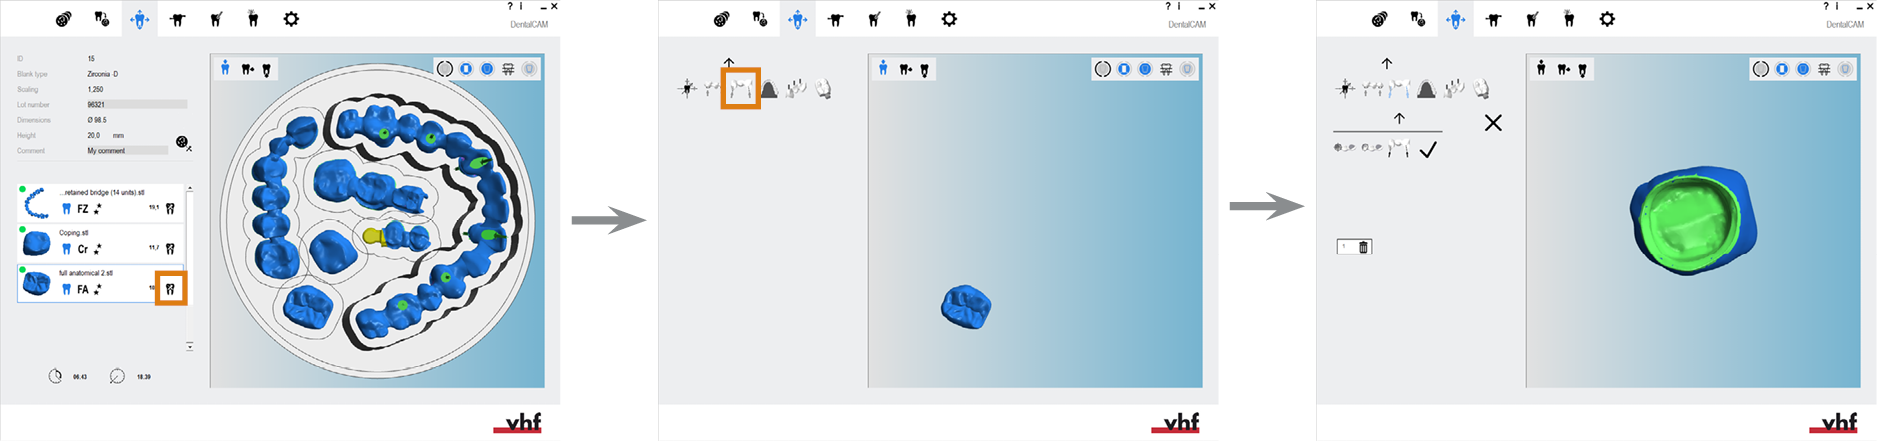
(Optional) Select the desired object in the blank display.
-
dentalcam highlights the object in the object list with a colored border.
-
Open the editing functions for the required object with the following icon in the left column:

-
The icon bar for the editing functions is displayed.
-
Open the editing function for marking cavities with the following icon:

- The icon bar for marking cavities is displayed.
- Icon for starting the workflow
- Icon for marking the prep-line
- Icon for adjusting the machining angle
- Icon for completing the workflow
- If the object has any incorrectly marked cavities, delete them.
- Start the workflow by selecting the following icon in the left column:

- Click in the center of the cavity you want to mark.
-
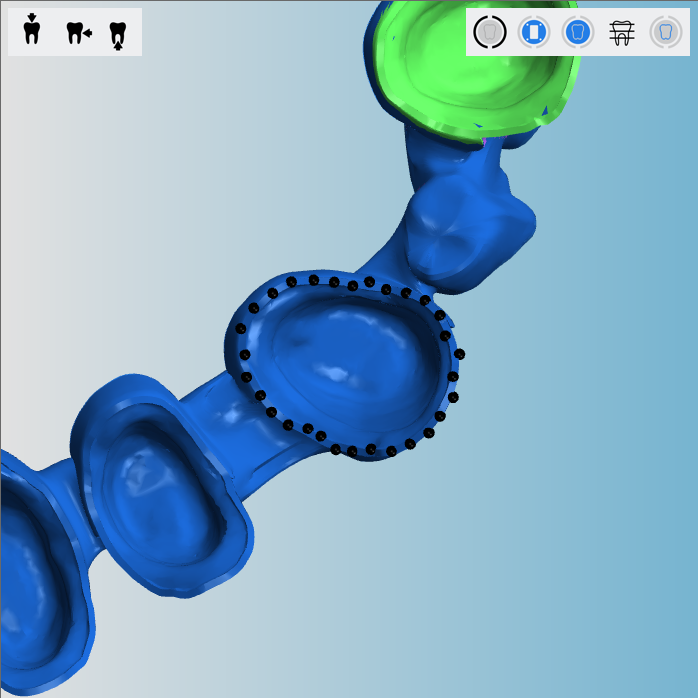
dentalcam tries to detect the prep line of the cavity and marks it with black dots.
Some dots may lie outside of the prep-line because dentalcam couldn’t recognize all parts of the prep-line correctly. You will have to manually correct these errors.
- Continue by selecting the following icon in the left column:

-
Activate or deactivate the placement aid by selecting the following icon (marked orange):
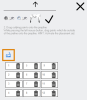
Icon for activating or deactivating the placement aid (marked orange)
- Icon when the placement aid is activated:

- Icon when the placement aid is deactivated:

- Icon when the placement aid is activated:
- If the placement aid is activated, the dots will snap to the prep-line.
- Drag all dots to the prep line. Select and hold outlying points and drag them onto the prep line of the cavity until the prep line is completely marked with points.
- Continue by selecting the following icon in the left column:

-
5-axis machines only: If the opening surface of the cavity is not parallel to the blank surface, correct the machining angle. As a result, the machine increases the angle of attack of the rotational axis and compensates for the alignment of the object in the STL file.
Rotate the object with the following value bars:
- RX: Rotate around the X-axis.
- RY Rotate around the Y axis.
The STL file remains unchanged. You must correct the machining angle for every affected cavity.
- Finish the workflow by selecting the following icon in the left column:

- dentalcam colors the cavity in green and adds it to the list of cavities in the left column. The application assigns a sequential number to the cavity.
-
Save your changes with the lower arrow icon:

-
Close the area for the editing function with the upper arrow icon:

Figure is an example
Opening the editing function for marking cavities (icons marked orange)
Icon bar for marking cavities; follow the workflow from left to right
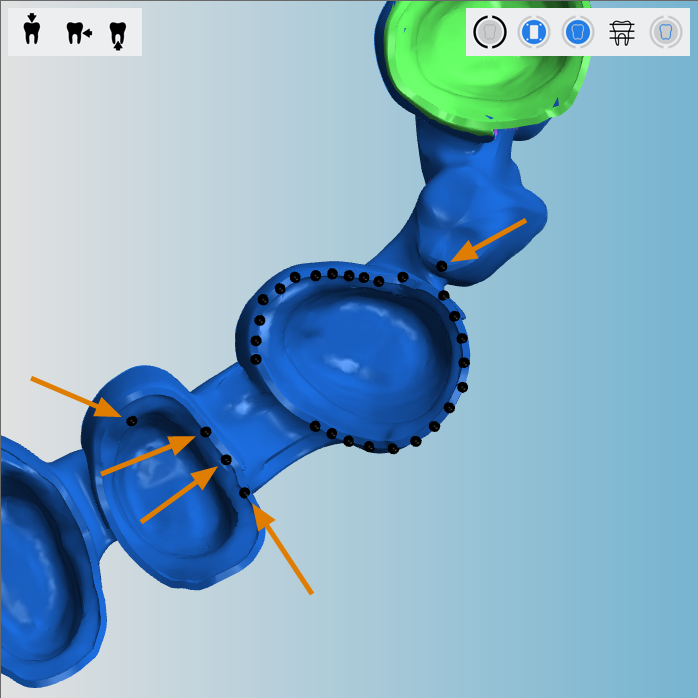
Marked prep-line of a cavity with several outlying points
A correctly marked prepline
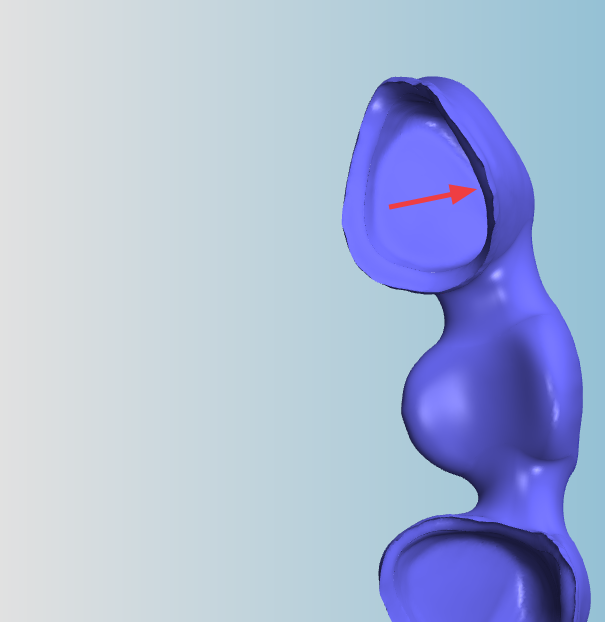
Object with improper orientation for milling out cavities; part which the tool cannot reach indicated by the arrow
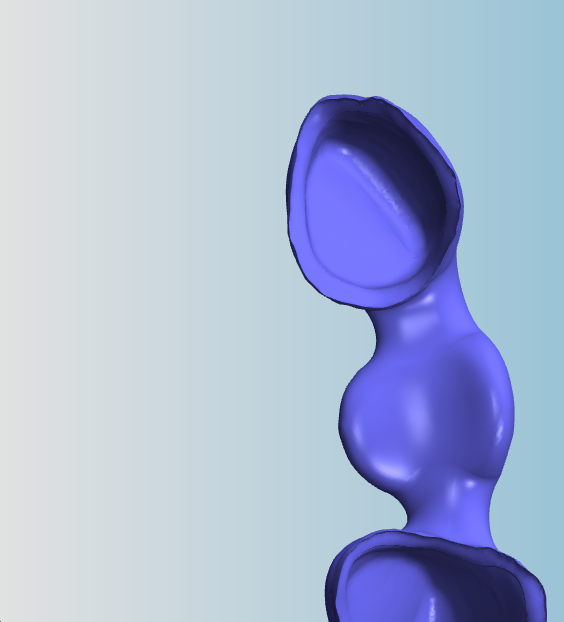
Object with corrected machining angle for milling out cavities
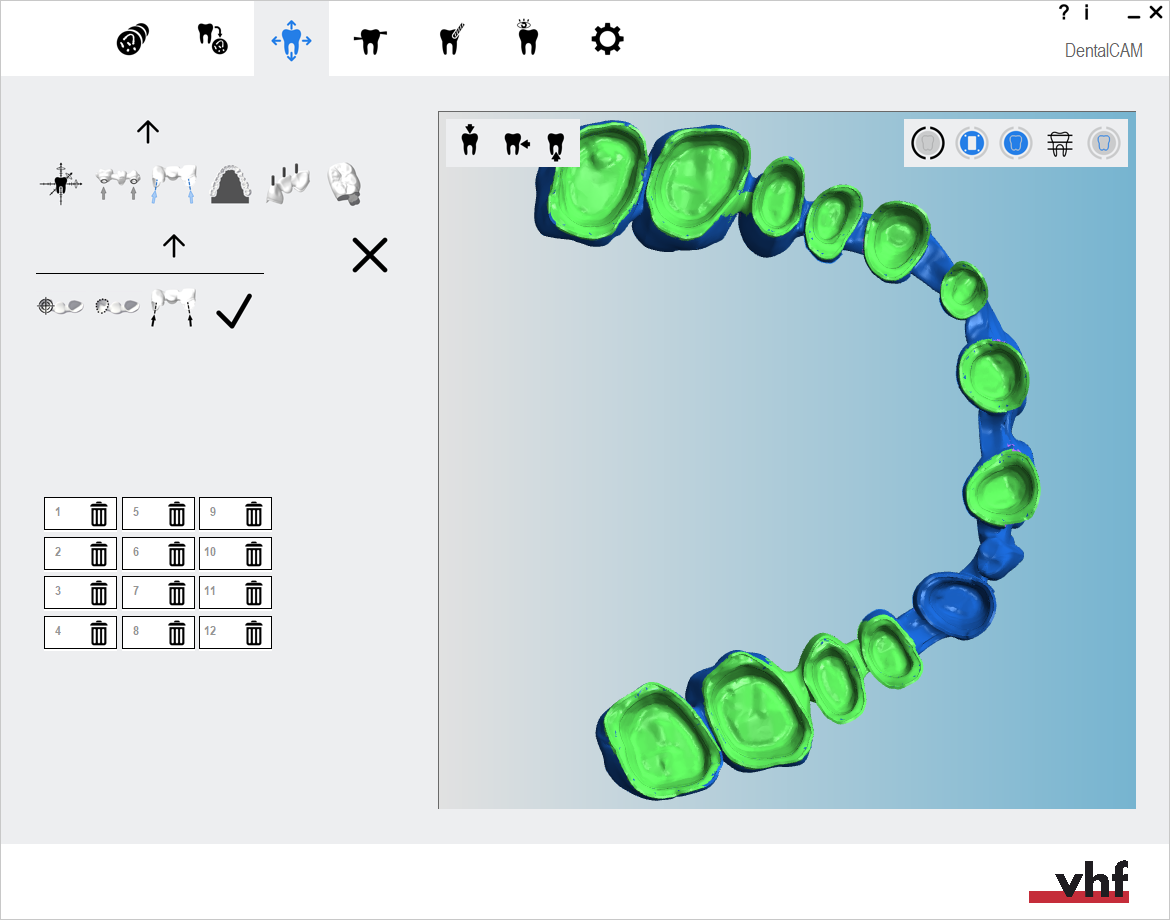
Deleting cavities
-
(Optional) Select the desired object in the blank display.
-
dentalcam highlights the object in the object list with a colored border.
-
Open the editing functions for the required object with the following icon in the left column:
-
The icon bar for the editing functions is displayed.
-
Open the editing function for marking cavities with the following icon:
- dentalcam displays a list of all marked cavities in the left column.
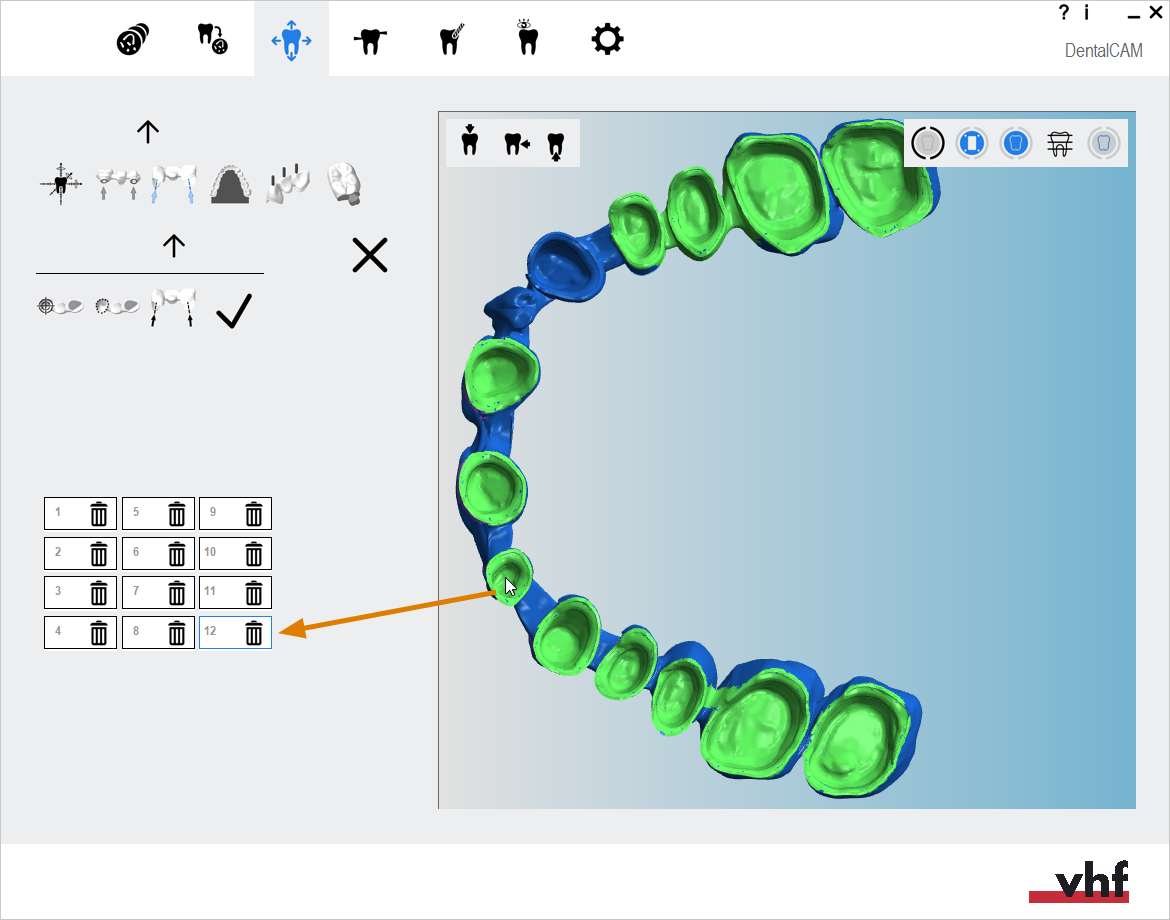
- To find the desired cavity in the list, select the marking for the cavity in the blank display.
- dentalcam marks the selected cavity in the list with a blue border.
- To delete the cavity, select the following icon:

- dentalcam removes the entry from the list and the cavity in the blank display is no longer colored in green.
- Manually mark the cavity.
-
Save your changes with the lower arrow icon:
-
Close the area for the editing function with the upper arrow icon:
Figure is an example
Opening the editing function for marking drilling ranges (icons marked orange)

A list of all marked cavities for 1 object
A list of all marked cavities for 1 object
What's next?
Next editing function for objects:
Creating sinter bars for bridges
If you are finished with adjusting objects:
If you are unsure whether you are finished nesting the current blank, see the simple and complete nesting workflow: