Switching between wet and dry machining
Watch the video
YouTube video – When viewing this video, personal data is sent to YouTube, LLC, USA. Privacy statement
The workflow for restoration is as follows:
→
→
→
→
Switching from wet to dry machining
-
If necessary, remove any leaked condensation from the back of the machine.
-
Open the working chamber door.
-
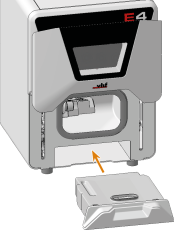
Pull the cooling liquid tank out of the machine.
-
Remove the drain insert from the working chamber.
-
Dry the working chamber.
NOTICE! The suction unit may be damaged if the working chamber is damp.
NOTICEDamage to the suction unit due to incorrect handling
-
The suction unit may be damaged if the working chamber is damp.
-
Dry the working chamber carefully.
-
-
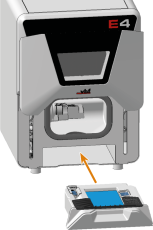
Push the dry machining tank into the compartment until it clicks into place.
-
Connect the suction unit.
-
If the machine controls the suction unit, turn it on and set it to the necessary level.
Switching from dry to wet machining
-
If the suction unit is running, switch it off.
-
Open the working chamber door.
-
Clean the working chamber door seal thoroughly with a damp cloth. Use a mild cleaning agent if necessary.
-
Pull the dry machining tank out of the machine.
-
Place the drain insert on the opening in the working chamber.
-
Make sure that there is enough cooling liquid in the cooling liquid tank. If you want to fill or change cooling liquid:
Exchanging the cooling liquid and cleaning the cooling liquid tank
-
Push the cooling liquid tank into the compartment until it clicks into place.
Make sure that the coarse filter mat is in the cooling liquid tank.
What's next?
Insert a blank into the blank holder.


