Inserting and exchanging tools
Watch the video
YouTube video – When viewing this video, personal data is sent to YouTube, LLC, USA. Privacy statement
The workflow for restoration is as follows:
→
→
→
→
NOTICE
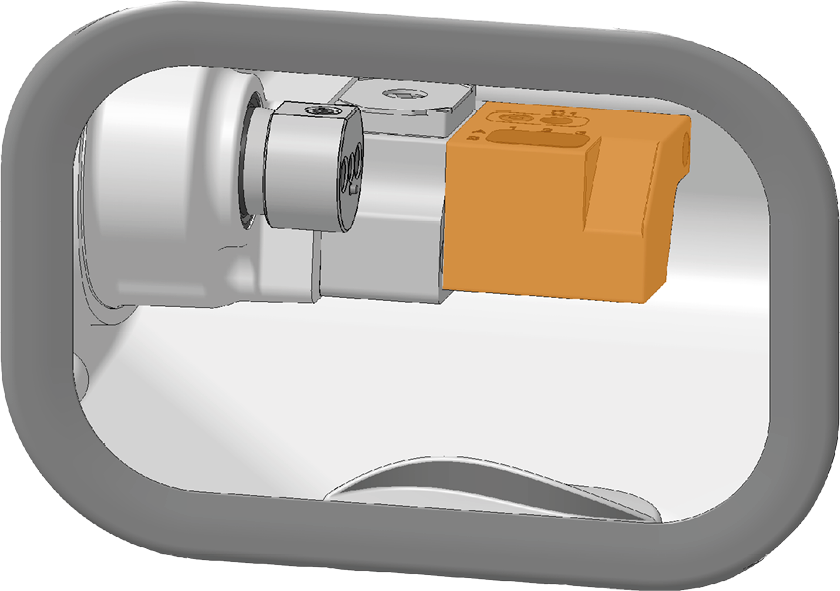
Damaging of the spindle or the tool positions if you use improper tools
Improper tools can damage the collet chuck of the spindle and / or the tool positions.
-
Only use tools with a sufficiently large chamfer at the tool shank.
-
Install a retaining ring as a stop ring according to DIN 471-A3.
-
See the further instructions in chapter Technical data.
The machine requires different tools for the different machining strategies during a job.
-
dentalcnc shows the tools (marked orange) needed for a job in the Machining view.
-
Tools are assigned via the Virtual Tool Magazine in dentalcnc.
Automatic or manual tool change
Tool change can take place automatically via the tool magazine or manually via the collet chuck. Since each tool position can be configured individually, automatic and manual changes are possible in parallel.
Automatic tool change properties
-
The machine automatically loads the necessary tools from the magazine during machining.
-
You must insert all required tools into the tool magazine before the job starts.
-
Default case for all tool positions where no manual change is configured in dentalcnc.
Automatic tool change is not possible in the following cases:
-
A tool position is worn out and can no longer hold any tools properly.
-
You use tools which do not fit into the tool magazine.
Manual tool change properties
-
During the application, you manually insert the tools into the spindle’s collet chuck at the request of dentalcnc.
-
You must configure this manual tool change for individual tool positions in dentalcnc.
-
This is described in the dentalcncmanual.
Inserting tools into the tool magazine
You can equip the tool magazine of your machine in two ways:
- By manual insertion into the tool magazine This is the fastest way.
- About the spindle You insert a tool into the collet chuck and the spindle places the tool in the tool magazine. This option takes more time, but might be more convenient for some.
 Term for the software package consisting of dentalcam and dentalcnc..
Tool magazine marked orange
You insert tools manually as follows:
-
CAUTION!Wear gloves.
-
Open the working chamber door.
-
Remove the tool magazine from the working chamber.
To do this, pull it to the right of the tool magazine holder.
-
NOTICE! Remove worn or damaged tools from the tool magazine if any. dentalcnc shows tool life in the tool management view.
-
Insert the new tools:
-
Ensure that the positions of the tools in the tool magazine match the tool positions in dentalcnc.
-
Insert the tools straight into the tool positions with the cutting edge pointing downwards. Push them in until the ring engages the tool magazine insert.
-
Ring
-
Tool magazine insert
-
If the new tool replaces an old tool of the same type, reset the tool life to dentalcnc.
-
When you have inserted all the tools you need, position the tool magazine on the tool magazine holder.
NOTICE! Tool breakage and defective machining results due to incorrect tool assignment
The vhftool packaging helps you to insert the tools.
Removing tools from the tool magazine
-
CAUTION!Wear gloves.
- Open the working chamber door.
-
Remove the tool magazine from the working chamber.
To do this, pull it to the right of the tool magazine holder.
-
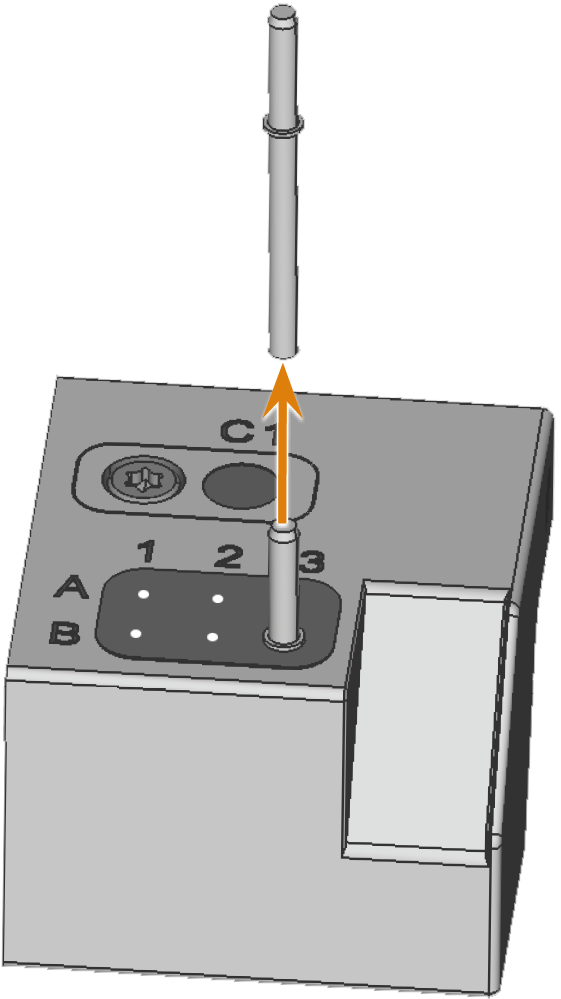
Pull the tool upward out of the tool magazine.
-
Depending on whether you place the tool back in your inventory or no longer use the tool type, configure dentalcnc accordingly:
Adding backup tools
If the tool life of a tool expires during machining, dentalcnc can automatically load a backup tool from the tool magazine to continue machining.
-
Place backup tools in the tool magazine.
-
Configure the backup tools in dentalcnc.
What's next?
If you machine the job dry, start the job:
Starting, interrupting, canceling jobs
If you machine the job wet, fill with cooling liquid:
Exchanging the cooling liquid and cleaning the cooling liquid tank