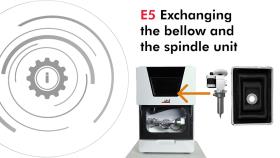
Exchanging the bellow
Recommendation: If the replacement of the spindle and bellow is due in accordance with the Table of wear parts and spare parts, replace the two components at the same time.
In that case we recommend the following sequence:
-
Detach the bellow from the spindle unit.
-
Remove the spindle unit.
-
Remove the bellow.
-
Install the spare bellow and attach the spare bellow frame.
-
Install the spare spindle unit.
-
Attach the spare bellow in the working chamber.
Description steps 1, 3, 4, 6:
Description steps 2, 5: Exchanging the spindle unit
Watch the video
YouTube video – When viewing this video, personal data is sent to YouTube, LLC, USA. Privacy statement
In this Help Article, some images have components hidden for clarity.
-
Have ready:
 Move the axes into the tool change position by selecting the depicted icon in the Machining view in dentalcnc.
-
Close dentalcnc.
-
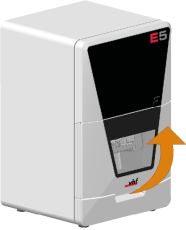
Open the working chamber door.
-
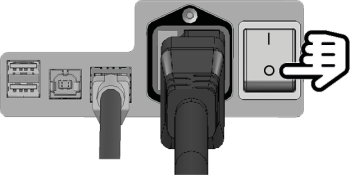
Switch off the machine at the main power switch.
-
Carefully push the spindle unit upward by hand until it reaches the stop.
-
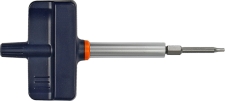
Loosen the 6 screws of the bellow fixation plate using the 1.5 Nm torque screwdriver with TX20 bit.
-
Pull the bellow fixation plate downward from the bellow.
-
Use the TX10 angle screwdriver to loosen the 3 screws that secure the bellow to the spindle unit.
-
Pull the bellow down over the spindle until the bellow has reached maximum expansion.
-
Close the working chamber door.
-
Remove the top service cover:
-
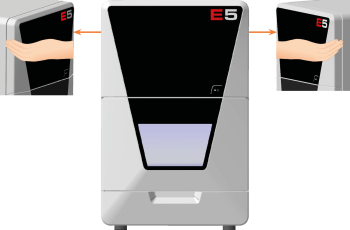
Grasp the recess on the left and right sides of the service cover.
-
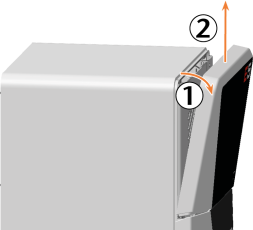
Lift the service cover out of the tabs.
-
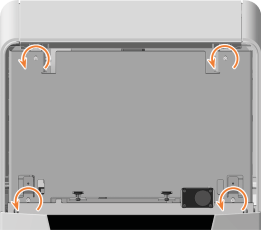
Use the 1.5 Nm torque screwdriver to unscrew the 4 screws that secure the safety cover.
-
Remove the safety cover.
-
If necessary, remove the spindle unit.
-
In the area behind the upper service cover, use the TX25 angle screwdriver to loosen the 12 screws that secure the bellow frame.
-
To reach each screw, carefully move the spindle unit or the spindle holder by hand in the X and Y directions.
-
To loosen the middle left screw (marked green), it must be in the recess.
-
-
Pull the bellow upward out of the machine.
If you did not remove the spindle unit, do the following:
-
The frame of the bellows is divided into two parts. Lift the frame ends and move them to the inside.
-
Turn the bellows and guide the rear part past the underside of the spindle unit.
-
Tilt the front part of the bellow up and the rear part down.
-
-
Align the spare bellow so that the opening for the positioning pin (marked orange) in the frame is on the right-hand side.
-
Insert the bellow into the machine. The positioning pin must be in the corresponding opening in the frame.
-
Use the TX25 angle screwdriver to tighten the frame of the bellow with 12 screws.
-
Open the working chamber door using the emergency release.
-
Pull the lower opening of the bellow upward over the spindle up to the stop and hold the bellow in this position.
The holes for the screws used to secure the bellow must be located on the corresponding screw holes in the spindle unit.
- Carefully move the spindle unit by hand in the X and Y directions until the bellow is not taut at any point.
-
Use the TX10 angle screwdriver to tighten the bellow with 3 screws in the front screw holes:
-
Carefully place the first screw and check if you can screw it in. If this is not possible, correct the position of the bellow.
-
Screw in all screws first without tightening them. This allows you to correct the position of the bellow.
-
When you have properly screwed in all the screws, tighten them.
-
-
Align the bellow fixation plate as shown in the following illustration.
-
Slide the bellow fixation plate over the spindle up to the bellow.
-
The holes for the 6 screws used to secure the bellow fixation plate are located on the corresponding screw holes in the bellow.
-
Using the 1.5 Nm torque screwdriver with TX20 bit, tighten the bellow fixation plate with 6 screws:
-
Carefully place the first screw and check if you can screw it in. If this is not possible, correct the position of the bellow fixation plate.
-
Screw in all screws first without tightening them. This allows you to correct the position of the bellow fixation plate.
-
When you have properly screwed in all the screws, tighten them.
-
-
Close the working chamber door.
-
Position the safety cover so that the 4 screw holes are located above the 4 screw holes in the machine housing.
-
Secure the safety cover to the machine housing using the 1.5 Nm torque screwdriver.
-
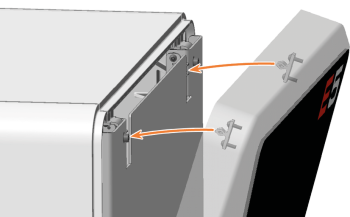
Attach the top service cover:
-
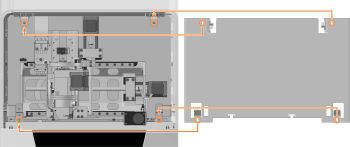
Insert the bolts (marked orange) of the service cover into the holders (marked green) on the safety cover.
-
Tilt the service cover towards the machine until it clicks into place.
-
-
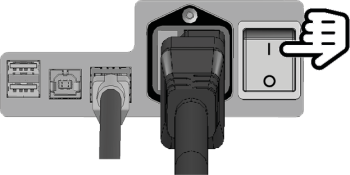
Switch on the machine at the main power switch.
-
Start dentalcnc.
-
Check that the machine references properly and that the bellow does not graze at any point.
In case of errors, contact customer service.
- Open the Maintenance section with the following icon in the main toolbar:

-
Select the following icon of the entry Exchange bellow:

