Mounting and removing blanks
The workflow for restoration is as follows:
→
→
→
→
Suitable blanks
The machine can process the following blanks:
- Blocks, max. size: 45 x 20 x 20 mm (L/D/H)
- Prefabricated abutments*
Extra equipment![]() Physical component which must be obtained separately and which adds new functionality to your machine. can be obtained from your customer service provider.
Physical component which must be obtained separately and which adds new functionality to your machine. can be obtained from your customer service provider.
Mounting blocks in the working chamber
Standard block holder
You can mount up to 3 blocks and have them machined in one job.
- Open the working chamber door.
- Loosen the fixing screw of the blank holder without unscrewing it.
- Remove all objects from the blank holder if any.
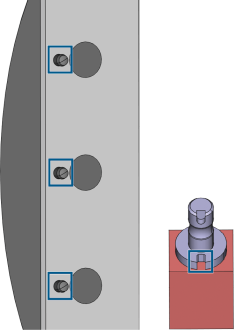
- Position the block so that the positioning pin at the block holder lies in the groove in the block shaft.
-
Insert the shaft of the block into the desired position in the block holder until it is firmly seated.
Positioning pins (left markings) must lie in the groove in the shaft (right marking)
- Use the provided torque screwdriver to tighten the fixing screws of the blank holder.
Block holder for PrograMillblocks (Extra equipment)
You can mount up to 2 blocks into the machine and have them machined in one job.
-
Open the working chamber door.
-
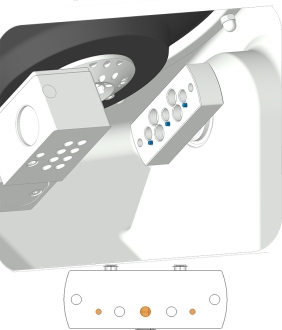
Position the block holder for PrograMill blocks on the standard block holder so that the recesses (marked orange) are above the positioning pins (marked blue).
-
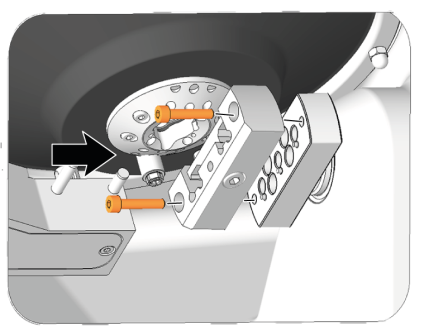
Screw down the block holder for PrograMill blocks with 2 screws.
-
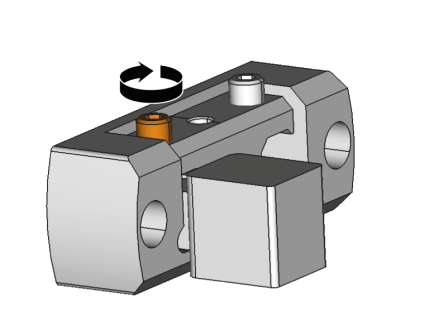
Loosen the fixing screw at the required position of the PrograMill block holder without unscrewing the screw completely.
-
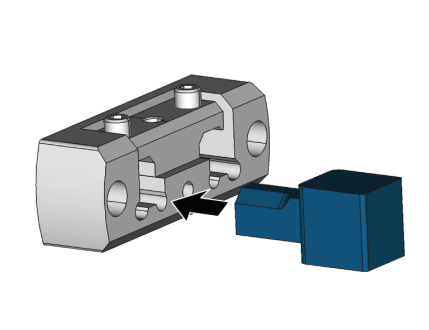
Insert the PrograMill block into the block holder.
-
Tighten the grub screw (marked orange).
Using the abutment holder
With an optional abutment holder, your machine can process prefabricated abutments with prefabricated connection geometries.
Abutment holders for common abutment systems can be obtained from customer service.
