Nesting special cases
Are there advanced nesting guidelines? Any nesting tips? How to handle difficult or unusual objects? Drillings and cavities are not correct – how to fix this?
While you can nest most objects as easily as described in the general Help Article on nesting, there are some objects where it might become a bit tricky. In this Help Article, we have put together some special cases and described how to handle them with consummate ease.
We plan to update this Help Article regularly.
In this Help Article, we presuppose that you know every function of the nesting view(s). Therefore, our instructions will be brief and only cover the characteristics of the described cases.
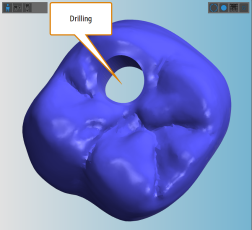
Some implant-borne crowns have a drilling inside their cavity.
Let’ specify the drilling range and mark the cavity:
- When importing the object, deactivate the automatic search function for cavities and drillings.
- Open the editing function for specifying the drilling range for the object.
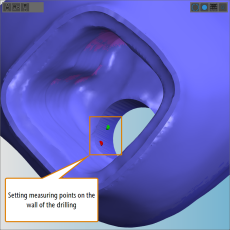
- Set the measuring points for one end of the drilling (in the following figure on the basal side).
- Draw the drilling range slightly larger than the drilling.
- Verify that the drilling range is appropriate and save your changes if it is.
- Repeat steps 3 – 5 for the occlusal side.
- You have properly specified the drilling ranges for the object.
- Open the editing function for marking cavities for the object.
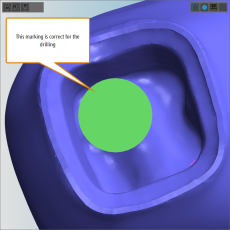
- Mark the cavity as usual.
- Verify that the cavity is appropriate and save your changes if it is.
- You have successfully specified the drilling ranges and marked the cavity for the object.
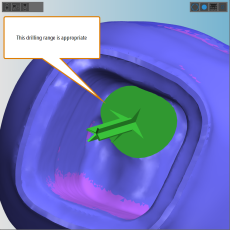
The size of the drilling range is fine (left figure) and so is the result for the basal side (right figure)
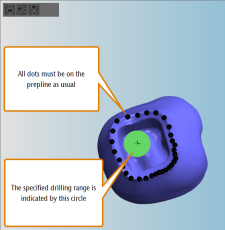
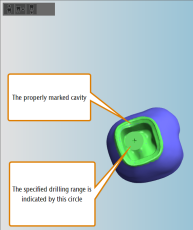
Marking the cavity as usual (left figure) so that the application correctly recognizes it (right figure)

