Installing and uninstalling
System requirements
Recommendation:
- CPU:
64-bit Intel Core i CPU of the 12th generation with at least 14 cores and 20 threads (e.g. Intel Core i7-12800H)
Alternative: 64-bit AMD Ryzen CPU with at least 8 cores and 16 threads (e.g. AMD Ryzen 7 6800H)
General:
The CPU has the greatest influence on the performance of trimcam, the GPU can be ignored.
Desktop CPUs are often more powerful than laptop CPUs.
With Intel, the H and HX series are preferred. The P and U series are often installed in particularly thin laptops.
Laptop CPUs prior to the 10th generation from Intel did not perform satisfactorily in some tests.
- Operating system: 64-bit version of Windows® 10 or 11
- Storage device: SSD with 512 GiB
- RAM 32 GiB
-
Display resolution: 1920 x 1080 (Full HD)
-
A permanent Internet connection
Installing trimcam
-
Activate the maximum power option.
-
Copy the trimcam installation files to your CAM computer
 The computer that is connected to your machine and which runs dentalcam and dentalcnc..
 -
Select the TrimCAM.exe file. Preferably run the file as administrator.
-
The installation wizard
Application which installs software on your hard drive and leads you through every single step. will guide you through the installation process. -
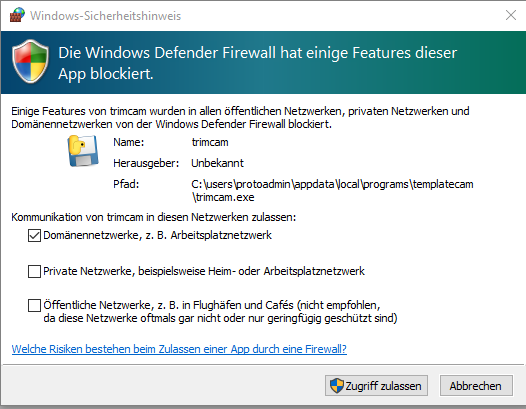
Depending on the firewall
Security software which monitors the network data to block harmful data. setting, a Windows Defender message may be displayed when the program is started for the first time. Confirm the message for the networks with which you use trimcam.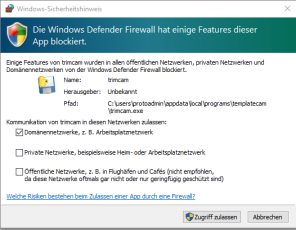
-
Start trimcam.
-
 Open the Settings by selecting the depicted icon.
 -
 Load the license file by selecting the depicted icon.
 -
Define the output folders.
Some components of trimcam require administrator rights for installation. These components increase the stability and speed of trimcam in particular.
trimcam uninstall
-
Select the desktop shortcut from trimcam with a right-click.
-
In the context menu, select Open file path.
-
Windows Explorer opens.
-
Go up one folder level in Explorer and run the Uninstall.exe file.
You can also enter the file path directly in Explorer. The default installation folder![]() The folder on your hard drive that you installed dentalcam and dentalcnc in. is C:\Users\*user*\AppData\Local\Programs\TrimCAM. You must replace the term *user* with your Windows user name.
The folder on your hard drive that you installed dentalcam and dentalcnc in. is C:\Users\*user*\AppData\Local\Programs\TrimCAM. You must replace the term *user* with your Windows user name.