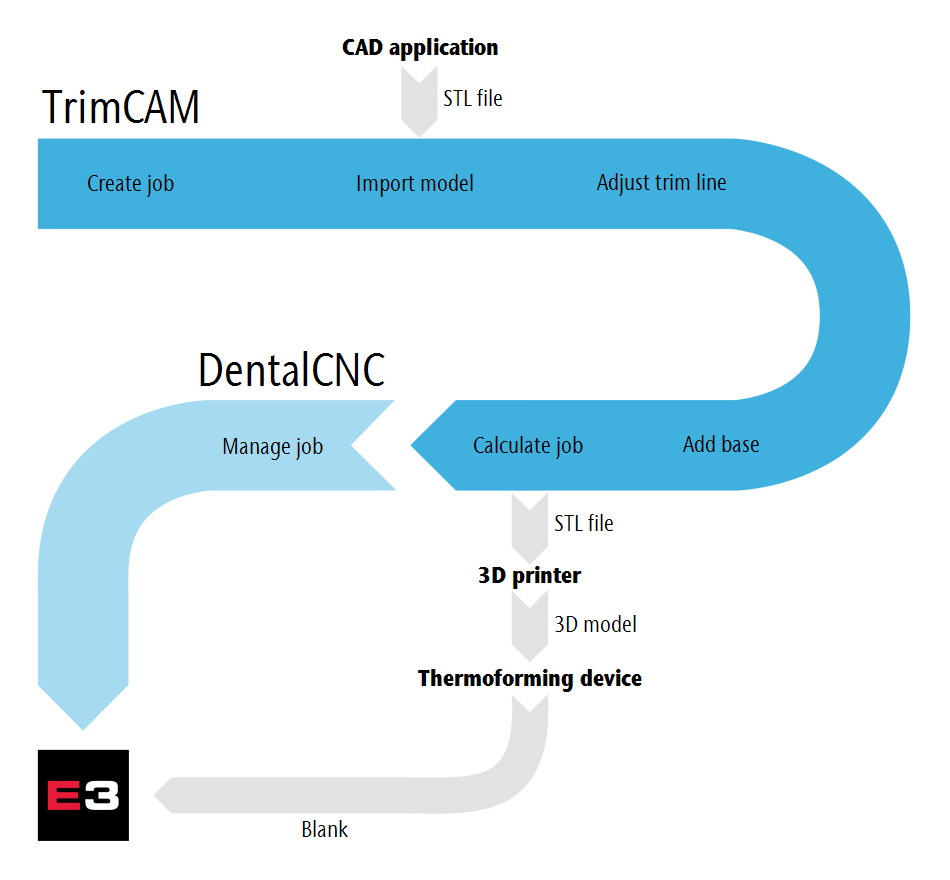
Basic workflow
You find out the basic steps that are required in order to manufacture dental splints with TrimCAM here.
- Create the job A job contains all the data required to machine a dental splint: 3D data, base and trim parameters, calculated milling path, etc.
- Import the dental arch model from your CAD application You create the 3D data for the dental arch model with an external CAD application.
- Adjust the trim line TrimCAM automatically detects the trim line. You enter the required parameter for this, e.g., the distance of the trim line from the gingival margin or the trim at the posterior molars.
- Add the base The base is added to the bottom of the dental arch model and contains the machine mount and if necessary, an elevation.
- Calculate the job TrimCAM calculates the optimal machining strategy and exports it for further processing in DentalCNC.
- Print the 3D model As soon as the base has been added, TrimCAM saves the STL file for the 3D printout of the dental arch model.
- Thermoform the protective foil Use the printed dental arch model to thermoform the protective foil.
- Mill the job Prepare the machine and start machining with DentalCNC.
Basic workflow