Exchanging the cooling liquid and cleaning the cooling liquid tank
-
Have ready:
-
Collecting container that can hold approx. 10 l
-
Cleaning brush
-
Water for cleaning the cooling liquid tank
-
Small cleaning brush
-
Carbon pellets and spare fine filter (optional)
-
A mild cleaning agent (optional)
-
Make sure that sufficient cooling liquid is available.
- Close the working chamber door.
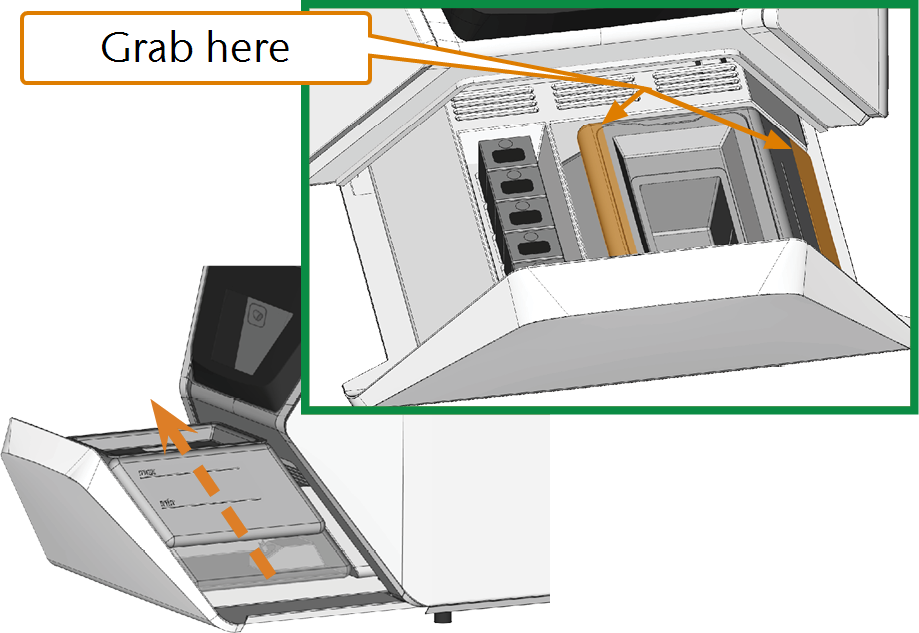
- Open the multi-purpose drawer.
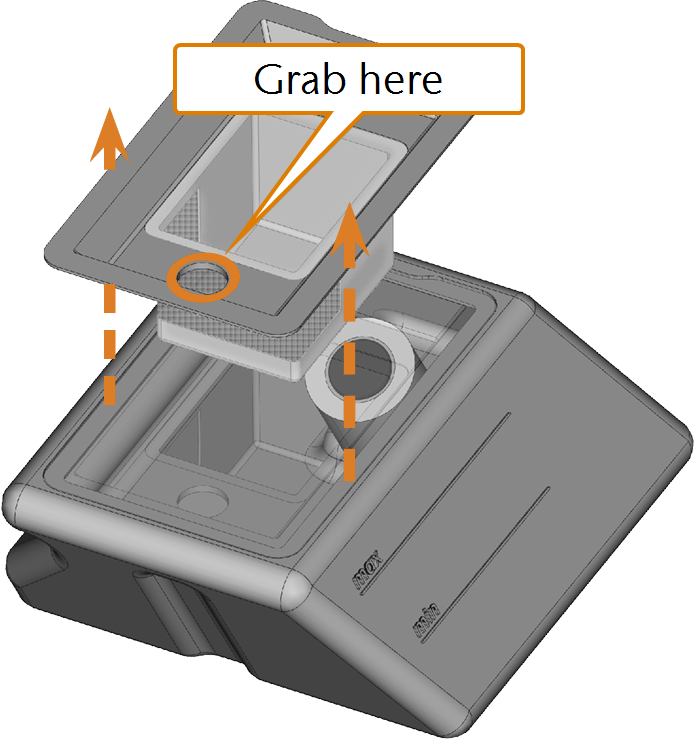
- Grasp the cooling liquid tank at the positions marked in the following figure. Pull it out of the drawer in the direction indicated by the arrow.
-
Lift the cover, including the strainer basket, off the cooling liquid tank.
-
If there is cooling liquid in the tank:
-
Empty the contents of the cooling liquid tank container into the collecting container.
-
Remove the strainer basket by pushing it out of the cover from below.
-
Clean the strainer basket:
-
Tap out the strainer basket into the collecting container.
-
While rinsing the strainer basket under running water, clean it thoroughly with the cleaning brush.
-
-
If you want to clean the cooling liquid tank in the dishwasher, do the following:
-
Make sure that the all disposal regulations for machining residues are always complied with.
-
Select a cleaning program with a maximum temperature of 70 °C.
-
-
If you want to clean the cooling liquid tank manually, do the following:
-
Thoroughly clean the cooling liquid tank with the cleaning brush.
-
Pour the cleaning water into the collecting container.
-
If you have used a cleaner, make sure that there is no residue of it in the cooling liquid tank.
-
- The cooling liquid tank is completely void of liquid, machining and cleaner residues.
- Fill in cooling liquid.
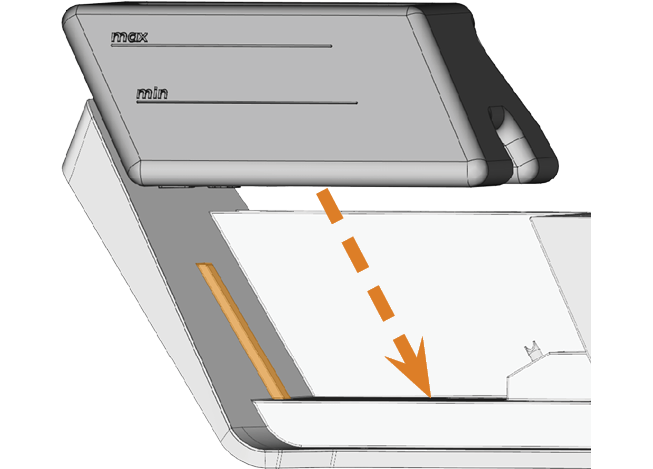
- Insert the cooling liquid tank (marked orange) into the multi-purpose drawer with the help of the guide rail.
- Push the cooling liquid tank into its end position until it is properly attached to the machine.
- The cooling liquid tank is connected to the cooling liquid system via the coupling.
- Close the multi-purpose drawer.
When you tilt the cooling liquid tank, the cover will not prevent the cooling liquid from leaking.
Information on the disposal of cooling liquid and machining residues: