Exchanging the cooling liquid and cleaning the cooling liquid tank
Watch the video
YouTube video – When viewing this video, personal data is sent to YouTube, LLC, USA. Privacy statement
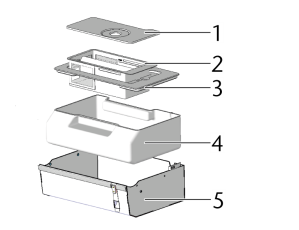
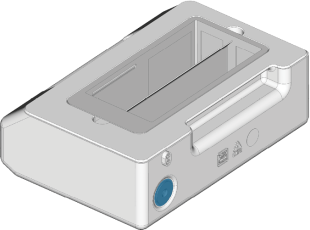
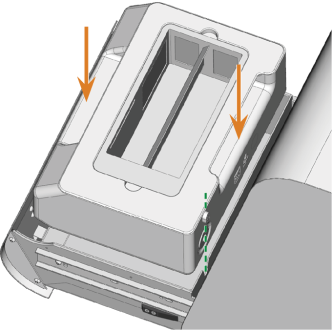
Design of the cooling liquid drawer
- Strainer basket cover*
- Strainer basket
- Cooling liquid tank cover
- Cooling liquid tank
- Cooling liquid drawer
* Not all machines include a stainer basket cover.
Preparation
-
Have ready:
-
Collecting container that can hold approx. 10 l
-
Cleaning brush
-
Water for cleaning the cooling liquid tank
-
Small cleaning brush
-
Carbon pellets and spare fine filter (optional)
-
A mild cleaning agent (optional)
-
Make sure that sufficient cooling liquid is available.
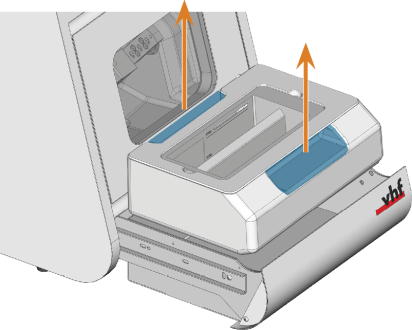
- Open the cooling liquid drawer.
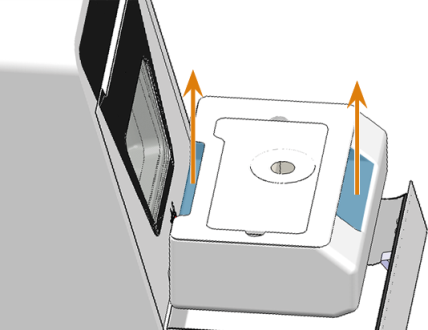
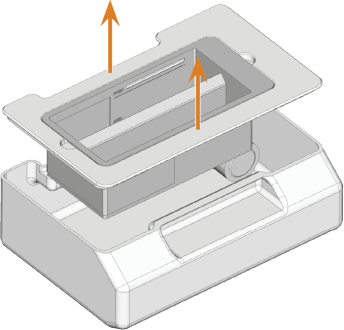
- Lift the cooling liquid tank out of the drawer.
When you tilt the cooling liquid tank, the cover will not prevent the cooling liquid from leaking.
Cleaning the strainer basket
- If present: Remove the strainer basket cover.
-
Lift the cover, including the strainer basket, off the cooling liquid tank.
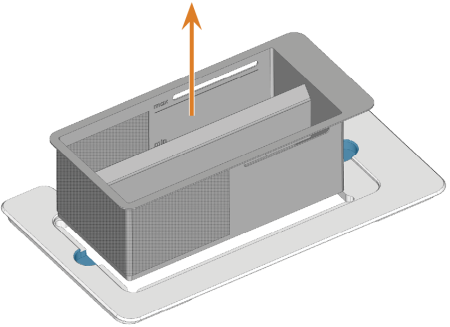
- Lift the strainer basket out of the cover.
-
Clean the strainer basket:
-
Tap out the strainer basket into the collecting container.
-
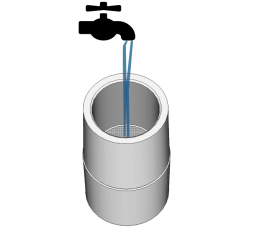
While rinsing the strainer basket under running water, clean it thoroughly with the cleaning brush.
-
Cleaning the cooling liquid filter and exchanging the carbon pellets
There are the following variants of the cooling liquid filter:
| Variant | Current | Filter fixation | Nut required? |
|---|---|---|---|
|
B |
No |
Screwed |
Yes* |
|
C |
Yes |
Screwed |
Yes* |
**An additional nut fixates the coupling of the cooling liquid tank onto which the filter is screwed. The nut is supplied with the spare part.
-
Older versions are possible no longer be available as spare parts.
-
All variants are compatible with all cooling liquid tanks.
-
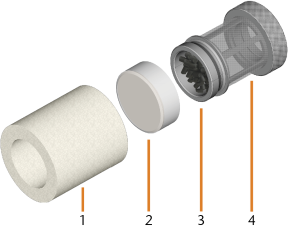
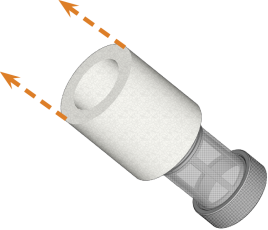
Pull off the fine filter.
-
Loosen the filter housing with a twisting motion and unscrew it.
-
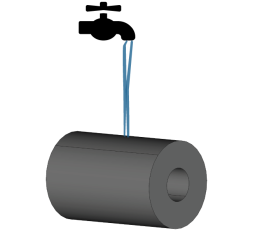
Rinse the back of the filter housing with running water.
-
Clean the outer and inner mesh filters with a small brush.
-
If you need to exchange the carbon pellets according to the interval in the maintenance table, do the following:
-
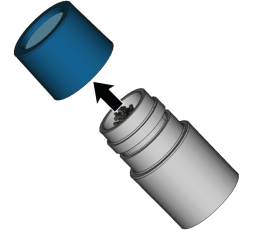
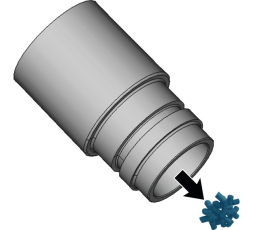
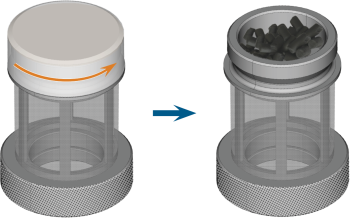
Remove the cap of the carbon filter from the filter housing by turning and pulling it at the same time.
-
Empty the carbon filter. Dispose of the carbon pellets.
-
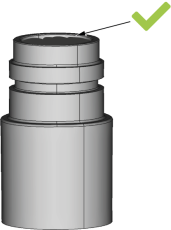
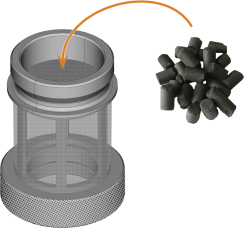
Fill new carbon pellets into the carbon filter up to approx. 1 mm below the edge.
-
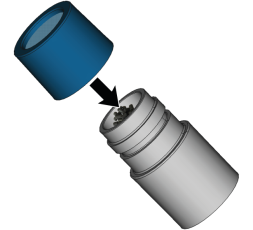
Fixate the cap of the carbon filter by turning and pressing on the filter housing at the same time.
-
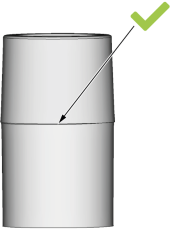
The cap of the carbon filter sits flush on the filter housing.
-
If you have not exchanged the carbon pellets, clean the fine filter carefully under running water.
If you have exchanged the carbon pellets, have a spare fine filter ready.
-
Recommendation: Clean the coupling of the cooling liquid tank.
-
Screw the filter housing onto the coupling in the cooling liquid tank.
-
Slide the cleaned fine filter or the spare fine filter onto the filter housing. Make sure that the fine filter completely covers the filter housing.
-
-
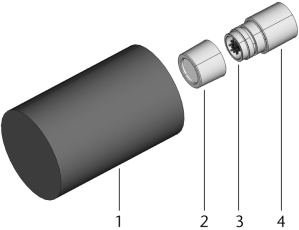
Grasp the filter housing by the metal ring and loosen it with a twisting motion.
-
Screw off the filter housing.
- Remove the fine filter by stretching the top end slightly and pulling it straight off the filter with both hands.
-
If you need to exchange the carbon pellets according to the interval in the maintenance table, do the following:
-
Unscrew the cap of the carbon filter from the filter.
-
Empty the carbon filter. Dispose of the carbon pellets.
-
Clean the carbon filter and dry it with a cloth.
-
Fill new carbon pellets into the carbon filter.
-
Firmly close the carbon filter with the cap.
-
If you have not exchanged the carbon pellets, clean the fine filter carefully under running water.
If you have exchanged the carbon pellets, have a spare fine filter ready.
-
Recommendation: Clean the coupling of the cooling liquid tank.
-
Slide the cleaned fine filter or the spare fine filter onto the filter housing.
-
Make sure that the fine filter covers the filter completely.
-
If the fine filter is too long, cut it to the length of your cooling liquid filter.
-
-
Screw the fine filter onto the coupling in the cooling liquid tank.
NOTICE! Damage to the fine filter due to excessive rubbing
-
NOTICE! Damage to the cooling liquid filter due to incorrect loosening
Cleaning the cooling liquid tank
- Empty the contents of the cooling liquid tank container into the collecting container.
- Thoroughly clean the cooling liquid tank with the cleaning brush.
-
Empty the dirty water into the collecting container.
If you have used a cleaning agent, make sure that there is no residue of it in the cooling liquid tank.
-
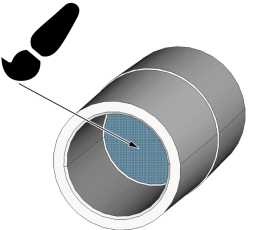
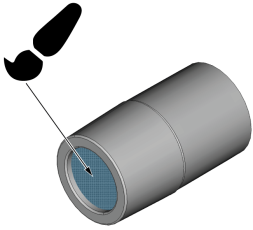
Remove dirt and foreign bodies from the coupling (marked blue) of the cooling liquid tank.
-
If present: Clean the strainer basket cover.
Completing maintenance
-
Place the cover onto the cooling liquid tank.
-
Insert the strainer basket into the cooling liquid tank cover.
-
If available: Place the cover of the strainer basket onto the cooling liquid tank.
- Fill in cooling liquid.
-
Insert the cooling liquid tank into the drawer.
- Close the cooling liquid drawer.
