Exchanging the blank holder clamping system
If the blank holder no longer properly fixates blanks, exchanging the clamping system of the blank holder may solve the issue. The respective spare part can be obtained from customer service. The spare part contains all parts that are removed as replacements in the following steps.
- Have ready:
- Spare clamping system for the blank holder
- Allen key (2.5 mm)
- Allen key (3 mm)
- Wrench (8 mm) if you are exchanging the clamping system for the first time
 Move the axes into the default position by selecting the depicted icon in the Machining view in dentalcnc.
 Open the Machining parameters view with the depicted icon in the local icon bar.
 Move the axes into the tool change position by selecting the depicted icon in the Machining view in dentalcnc.
- Open the working chamber door.
- Switch off the machine at the main power switch.
- You can rotate the blank holder freely.
- Open the blank holder.
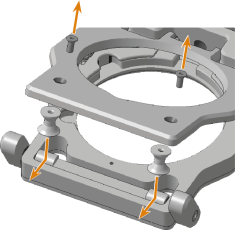
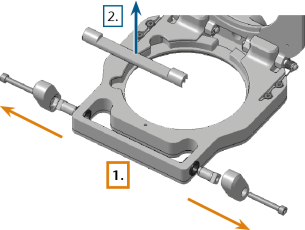
- Unscrew the 2 screws on the upper side of the blank holder cover with the 2.5 mm allen key and remove the 2 double cones of the clamping system.
-
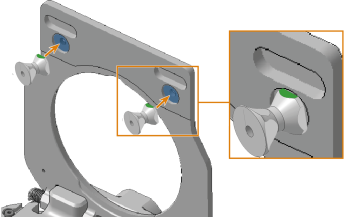
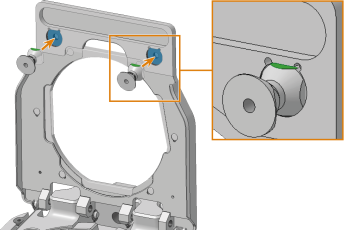
Place the spare double cones of the clamping system in the recesses (marked blue) of the blank holder cover and screw them down with the 2.5 mm allen key. There are 2 variants of the blank holder cover.
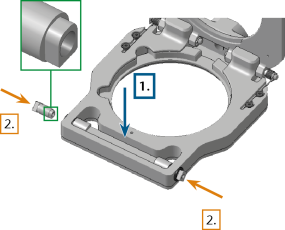
- Remove the blank holder levers and the shaft between them:
- Hold the shaft in place, unscrew the blank holder levers with the 3 mm allen key and remove them.
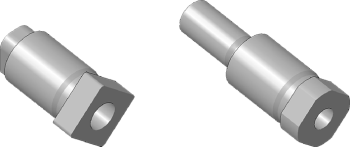
If the screws of the blank holder levers have the same length as the spare screws, pull the positioning aids out of the shaft.
If the spare screws are longer, unscrew the positioning aids from the shaft with the 8 mm wrench.
- Remove the shaft of the clamping system.
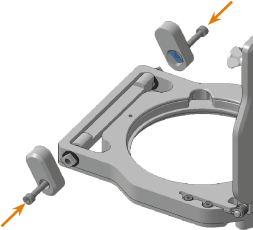
- Insert the spare shaft of the clamping system:
- Position the shaft in the blank holder, with the rounded surface to the front and the rectangular recess to the top. Hold the shaft in place.
- Insert the partly rounded connection geometry of the positioning aids into the shaft, with the rounded part to the top.
- Ensure that all parts fit exactly into each other.
- Place the spare blank holder levers in the “open” position on the positioning aids and screw them in place with the 3 mm allen key. Pay attention to the shape of the recess (marked blue) in the blank holder levers.
- Check if the blank holder opens°/ closes properly and if the blank holder cover is fixated as required. If this is not the case, the installation of the clamping system must be checked.
- Close the blank holder.
- Close the working chamber door.
- Switch on the machine at the main power switch.
- Restart dentalcnc.
- The machine references.
