Mounting and removing blanks
The workflow for restoration is as follows:
→
→
→
→
The machine can process the following blanks:
-
- Blocks, max. size: 45 x 20 x 20 mm (L/D/H)*
- Prefabricated abutments*
Extra equipment![]() Physical component which must be obtained separately and which adds new functionality to your machine. can be obtained from your customer service provider.
Physical component which must be obtained separately and which adds new functionality to your machine. can be obtained from your customer service provider.
How to mount the different blank types
| Blank type | Holder required? | Mount like this |
|---|---|---|
|
|
No |
Discs >> Blank holder |
|
Blocks |
Yes |
Blocks |
|
Prefabricated abutments |
Yes |
Prefabricated abutments >> Prefabricated abutment holders >> Blank holder |
Mounting discs in the working chamber
- Open the working chamber door.
- Unlock the blank holder by pulling the left and/or right blank holder lever (marked orange in the figure) towards yourself into the end position.
- The blank holder cover moves upwards and the blank holder is open.
- Remove the blank from the blank holder if present.
- To insert the disc to be processed, do the following:
- If the disc is multilayered, align the blank so that the top layer of color is on top.
- If the disc was already machined, ensure that:
- The original top side faces upwards.
- If the disc has been marked for safer remounting via dentalcnc, make sure that the marking is in the position shown below.
- Push the disc into the blank holder.
- Always close the blank holder as it is described below.
- Make sure that the blank holder levers are firmly closed.
- Do not apply excessive force when closing the levers.
- To close the blank holder, do the following:
- Make sure the blank holder levers are in the front position, as indicated in the figure below.
- Press the cover of the blank holder downwards and hold it in place.
- Lock the blank holder by pushing the left and/or right blank holder lever (marked orange in the figure) away from you until you notice a distinct resistance and the levers are firmly closed. Do not apply excessive force.
Damage to the machine / tool or poor machining results due to insufficient fixation of the blank
If the blank holder is not closed correctly, the blank will not be properly fixated and the blank holder may get damaged. As a result, the machine and tools may get damaged and the machining results may not be satisfactory.
- The disc is fixated in the blank holder. The disc is mounted in the working chamber.
Mounting blocks to the block holder
You can mount up to 3 blocks to the block holder.
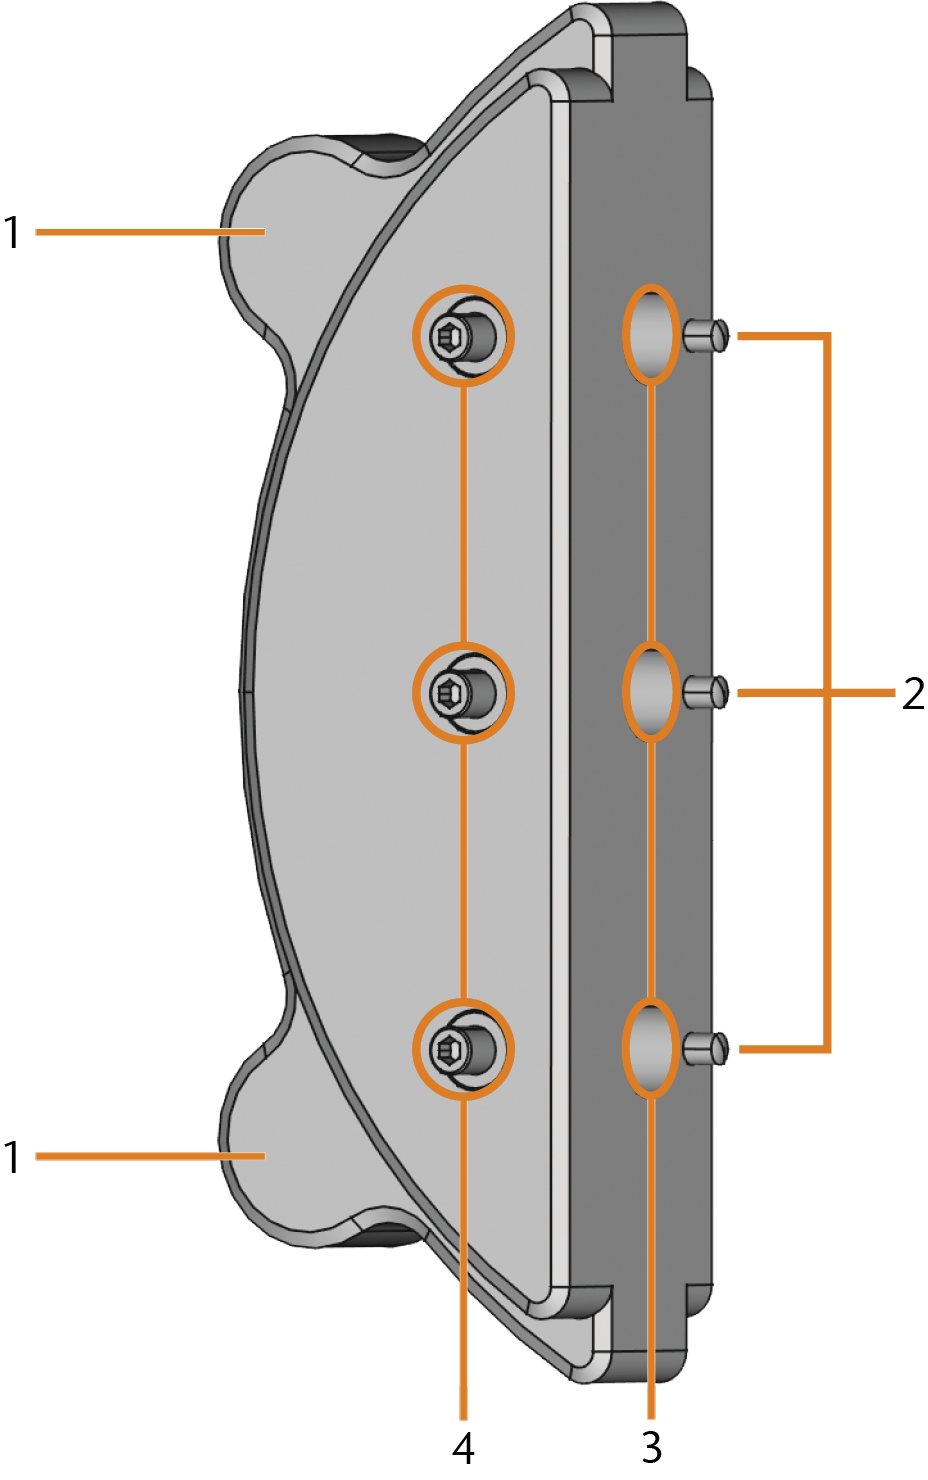
-
- Positioning aids of the block holder
- Positioning pins
- Holes for block shafts
- Fixing screws
-
CAUTION!Wear gloves.
-
The block type, the number of blocks and the block positions must correspond to the corresponding job in dentalcam.
-
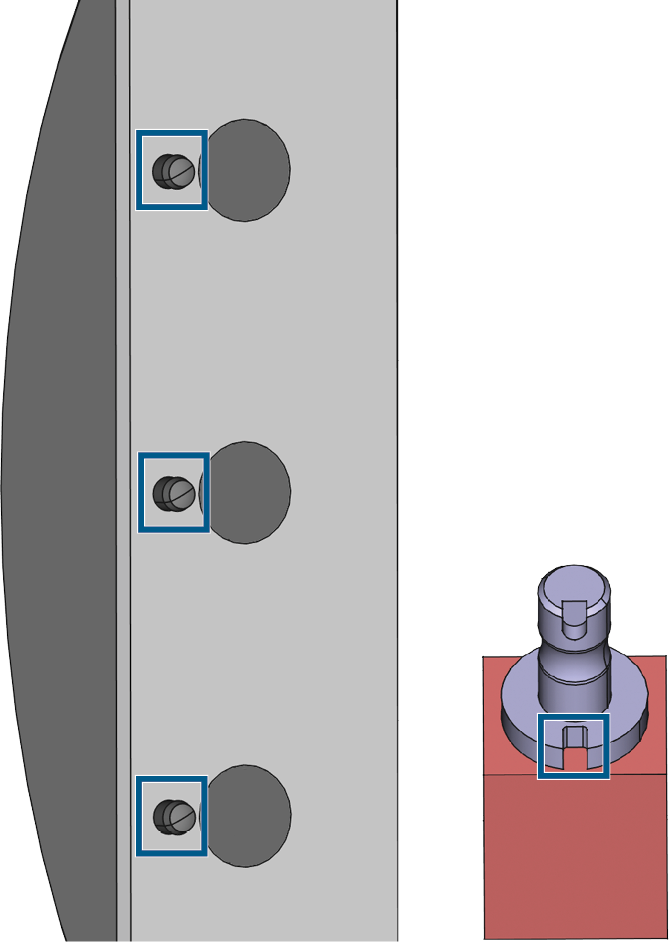
Loosen the fixing screw at the desired position with the torque screwdriver supplied.
-
If the block is multilayered, align the blank so that the top layer of color is on top.
-
Position the block so that the positioning pin at the block holder (markings on the left) lies in the groove in the block shaft (marking on the right).
-
Insert the shaft of the block into the desired position in the block holder until it is firmly seated.
-
Use the torque screwdriver supplied to fix the block with the corresponding fixing screw. Tighten the screw firmly.
NOTICE! Tool breakages and defective machining results due to incorrect block assignment
Mounting the block holder in the working chamber
- Open the working chamber door.
- Open the blank holder.
- Remove the blank from the blank holder if present.
- Correctly orient the block holder:
- The fixing screws must face upwards.
- The positioning aids must be positioned on the left side.
- Insert the block holder into the blank holder and hold it in place with one hand from below.
- Close the blank holder with the other hand.
Using an optional abutment holder
With an optional abutment holder, your machine can process prefabricated abutments with prefabricated connection geometries.
Abutment holders for common abutment systems can be obtained from customer service.