Disassembling and assembling the machine housing
Watch the video

YouTube video – When viewing this video, personal data is sent to YouTube, LLC, USA. Privacy statement
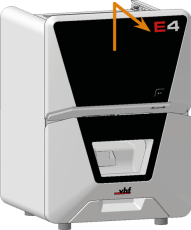
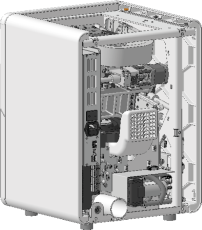
The figures in this description show the E4, but the relevant components of the E3 are identical or very similar. The described procedure applies for both machines.
To exchange some spare parts, you must disassemble parts of the machine housing.
Safety instructions
-
If you have carried out work on electrical components or cables that are described in the service instructions, check the electrical safety of the machine in accordance with national or local guidelines.
The components of the machine housing
You must remove the back panel and top cover before removing other housing components.
The machine housing consists of the following components:
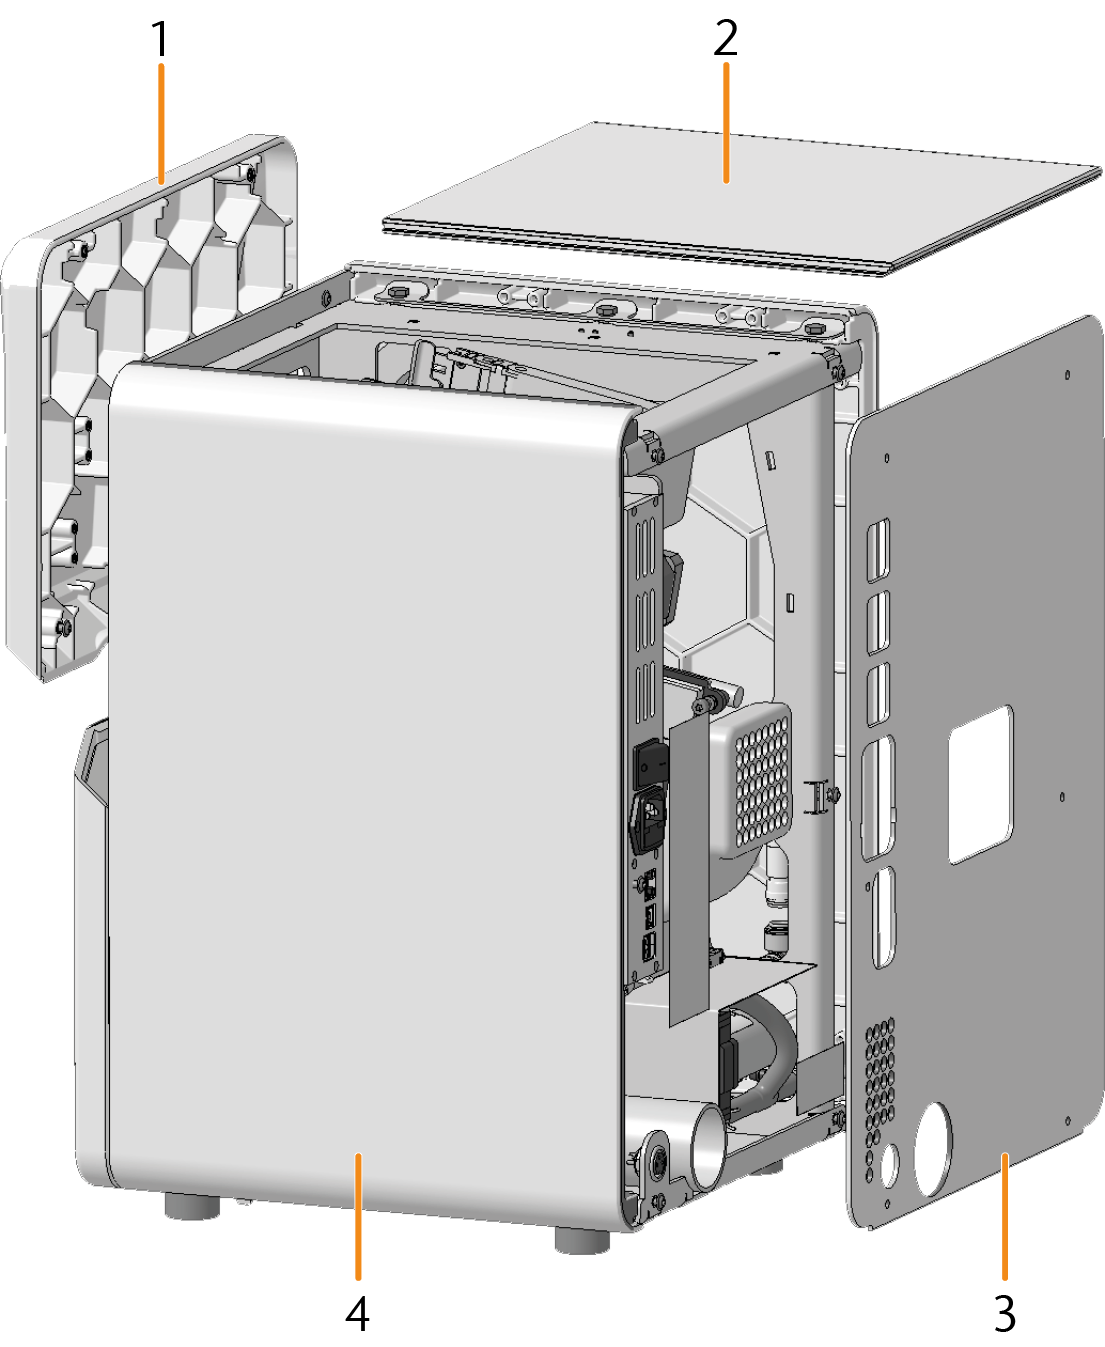
- Service cover
- Top cover
- Back panel
- Side panel
Have ready:
1 x 10 mm wrench

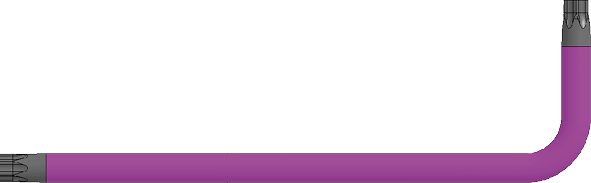
1 x TX20 angle screwdriver
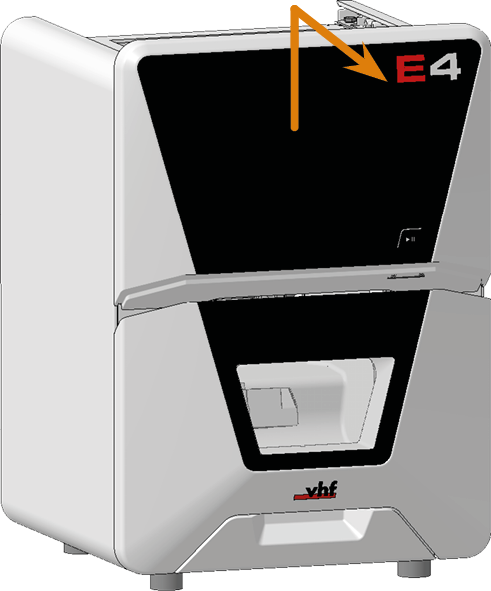
Removing and installing back panel and top cover
Removal
-
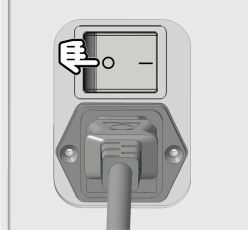
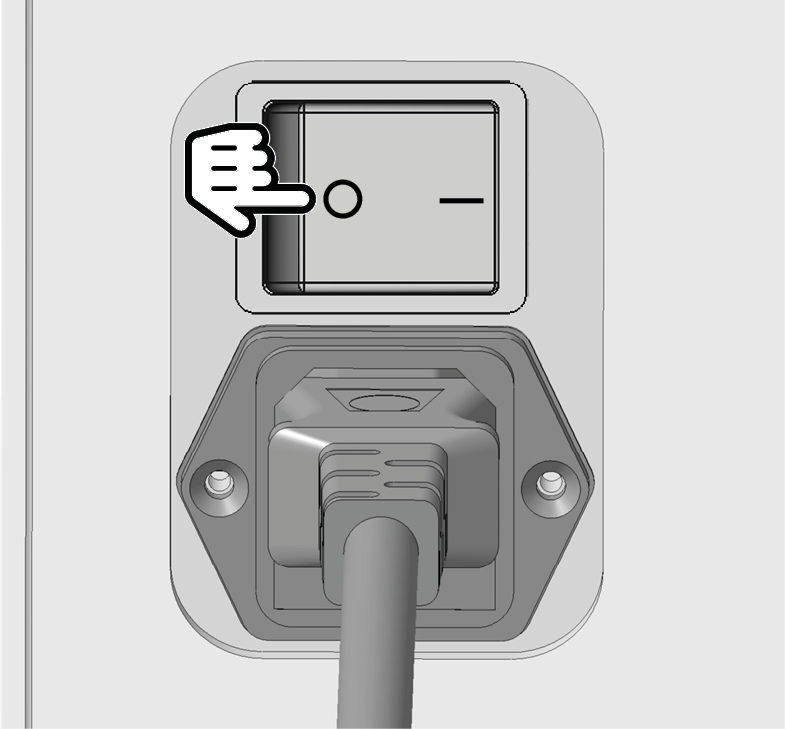
Switch off the machine at the main power switch.
-
Disconnect the machine from all lines.
-
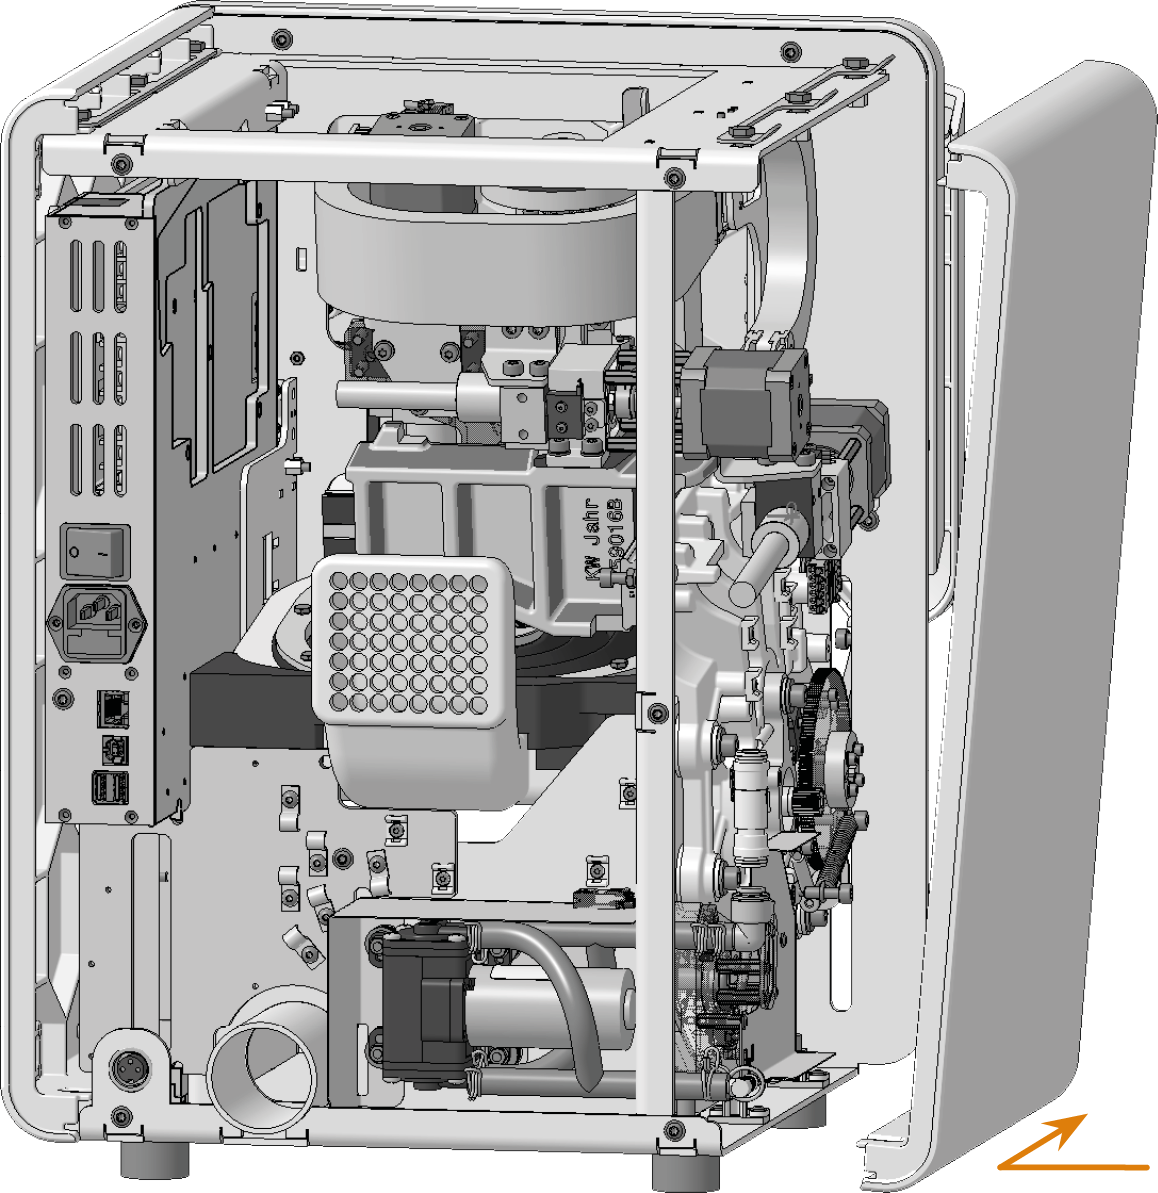
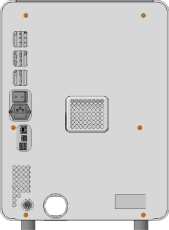
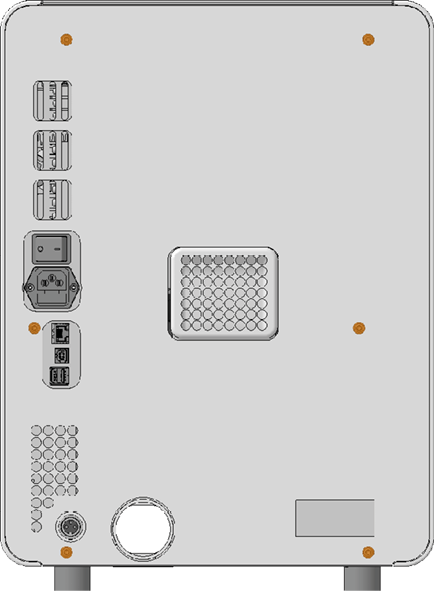
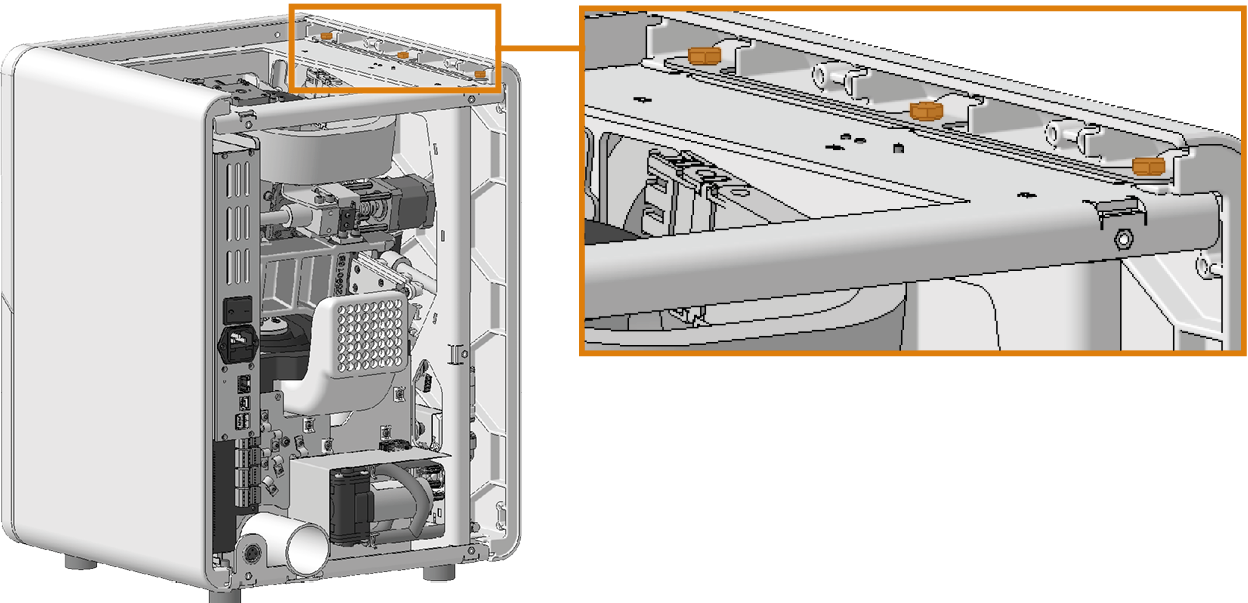
Use the TX20 angle screwdriver to unscrew the 6 screws (marked orange) that secure the back panel.
E3: The back panel is available in 2 variants, it is fixed with either 6 or 4 screws.
-
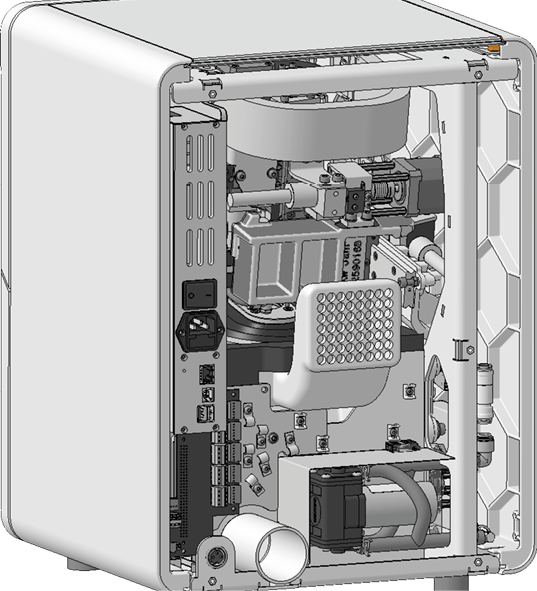
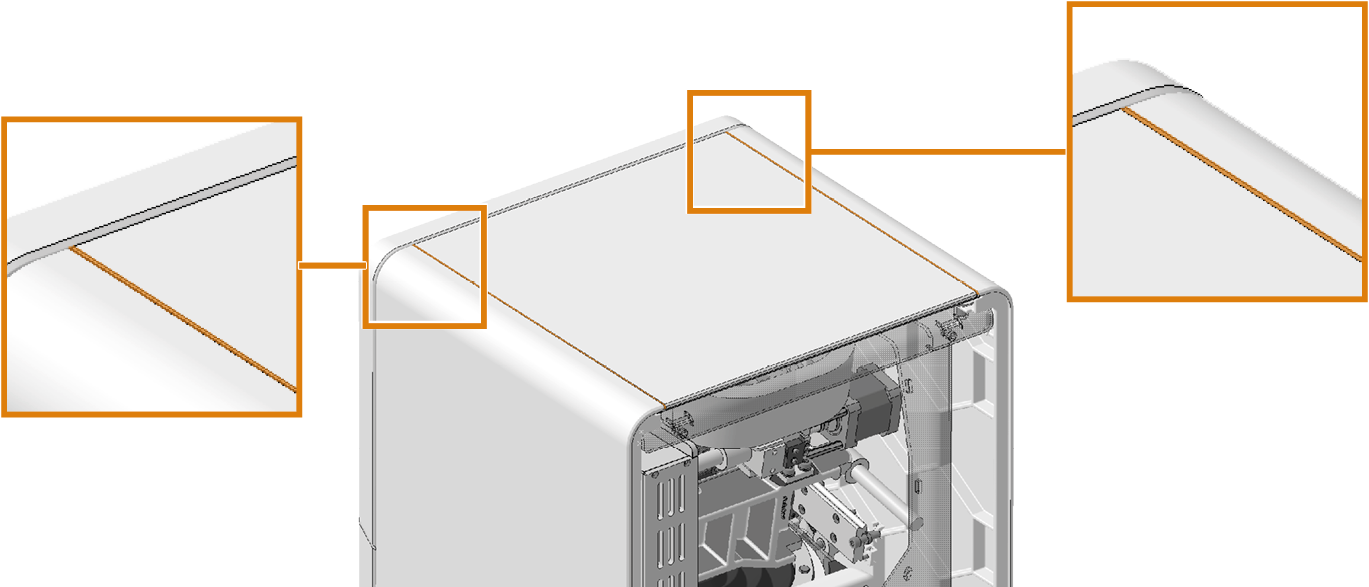
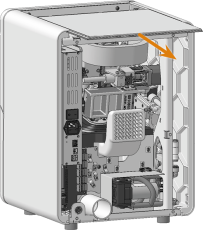
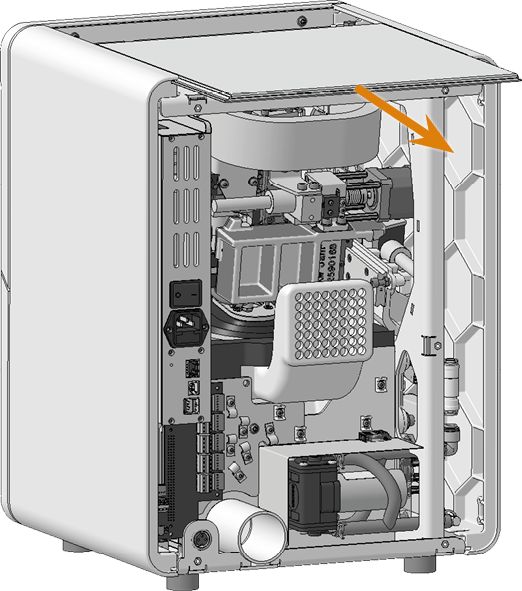
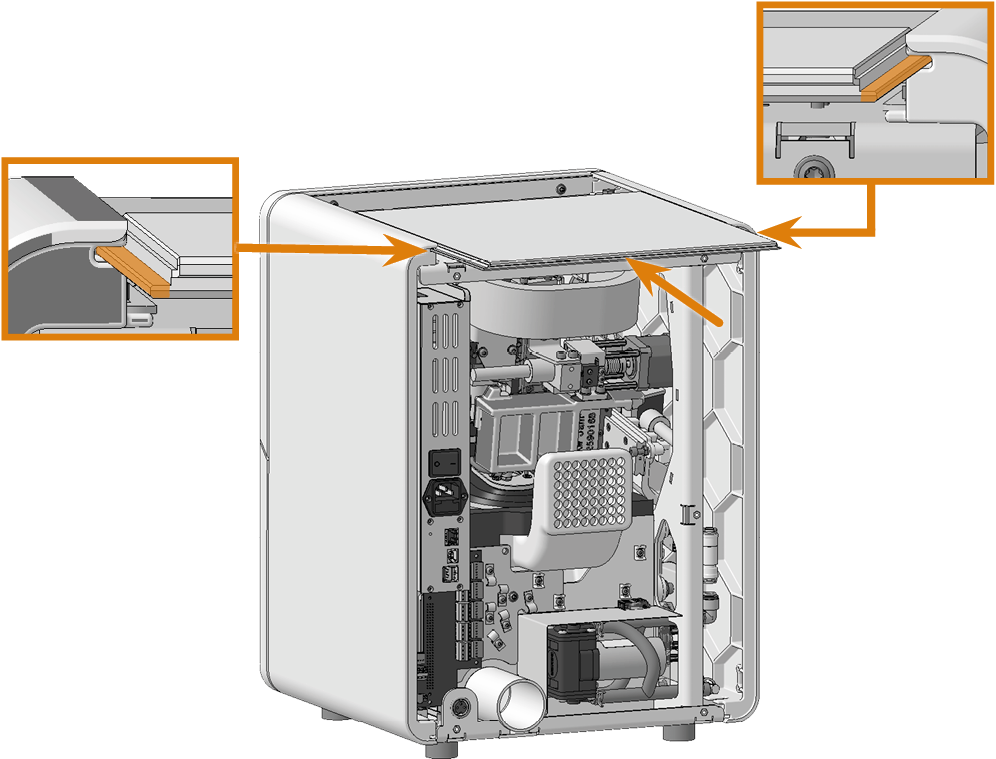
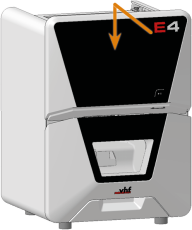
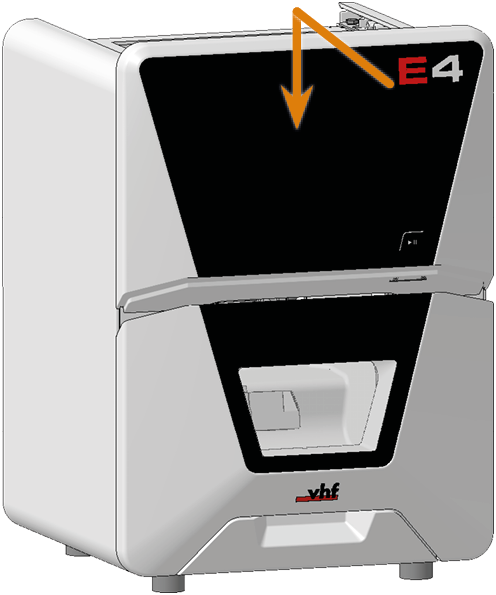
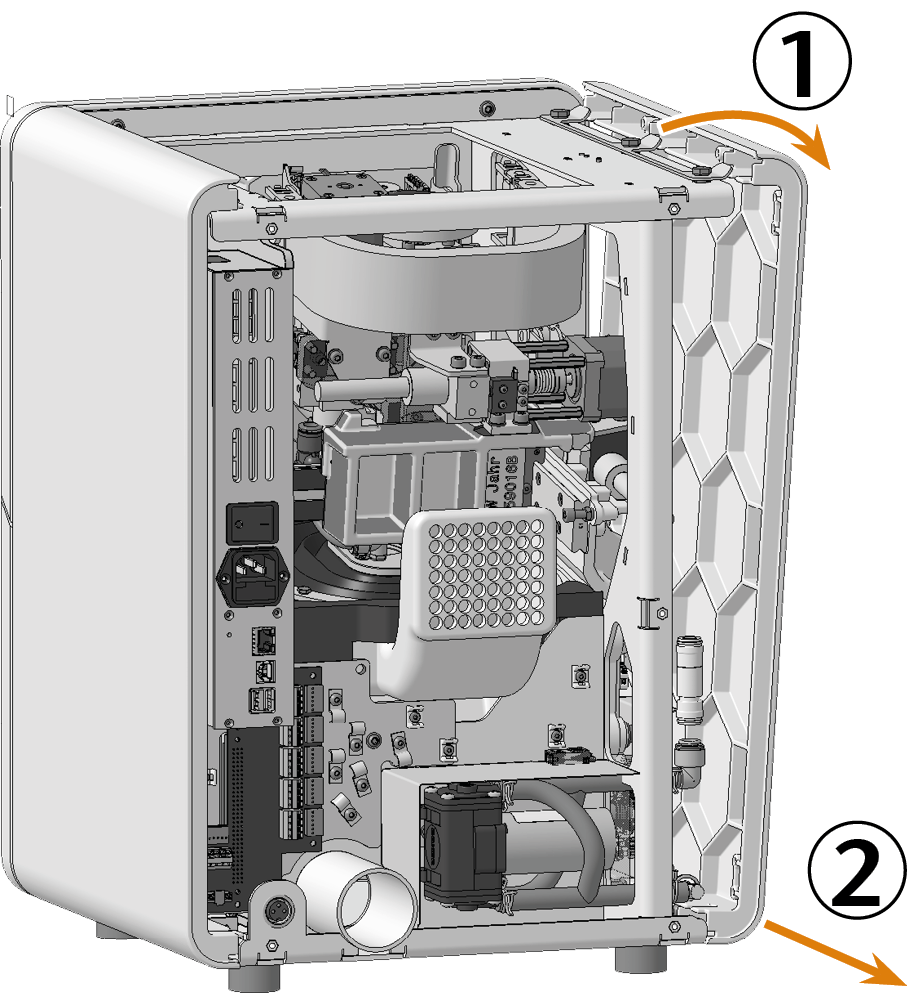
Slide the top cover back out of the machine.
Installation
-
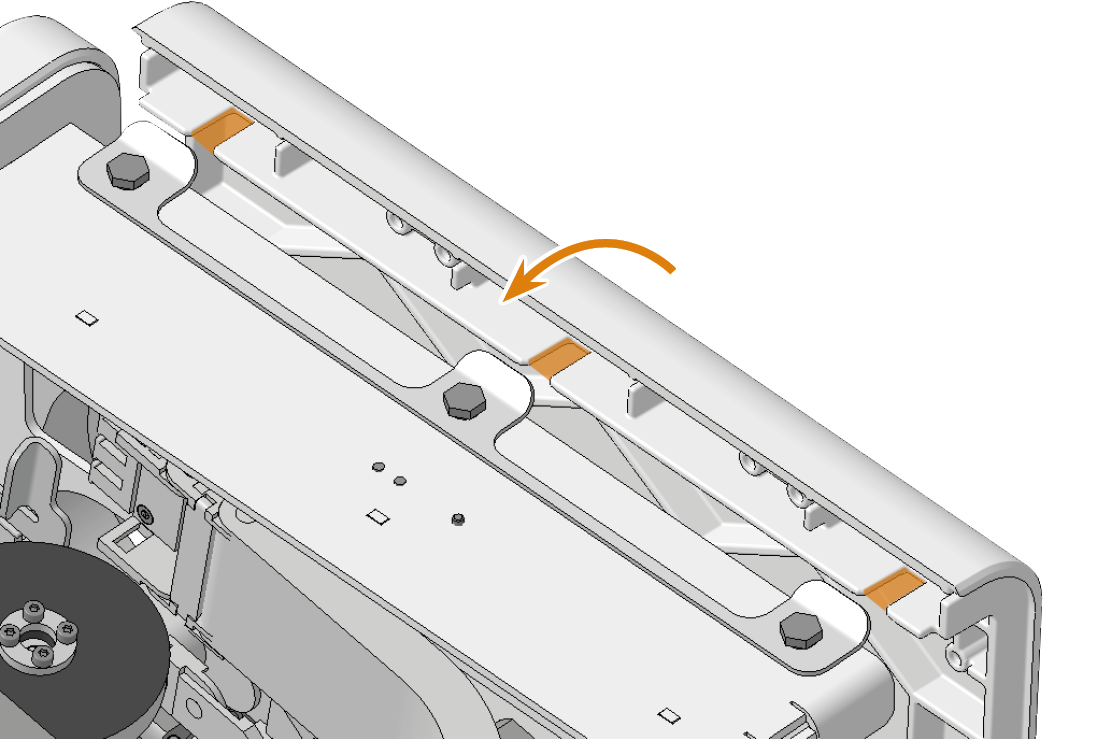
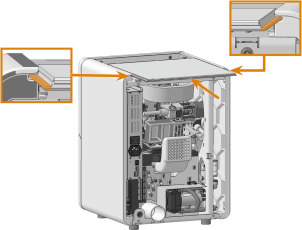
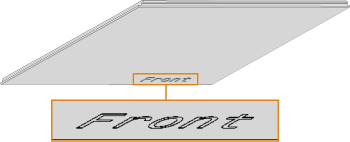
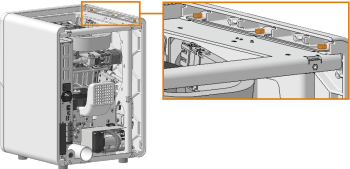
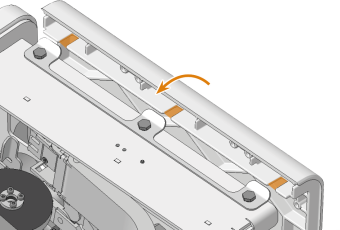
Position the top cover between the side panels. Insert the profile of the top cover (marked orange) into the guide of the side panels. Make sure that the Front label on the inside of the top cover is facing the front of the machine.
-
Slide the top cover completely to the front of the machine.
-
Use the TX20 angle screwdriver and the 6 screws (marked orange) to screw the back panel to the machine .
E3: The back panel is available in 2 variants, it is fixed with either 6 or 4 screws.

Removing and installing the service cover
Removal
-
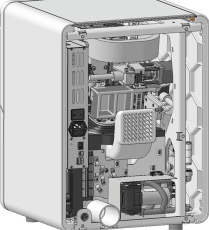
Use the TX20 angle screwdriver to unscrew the 2 screws (marked orange) that fasten the service cover panel.
-
Hold the service cover on the left and right side.
-
Move the service cover upwards.
-
Remove the service cover.

Installation
-
Position the 2 screws (marked orange) in the service cover in the openings in the front panel.
-
Press the service cover lightly against the front panel and slide it down.
-
Use the TX20 angle screwdriver and the 2 screws (marked orange) to screw the service cover in place.
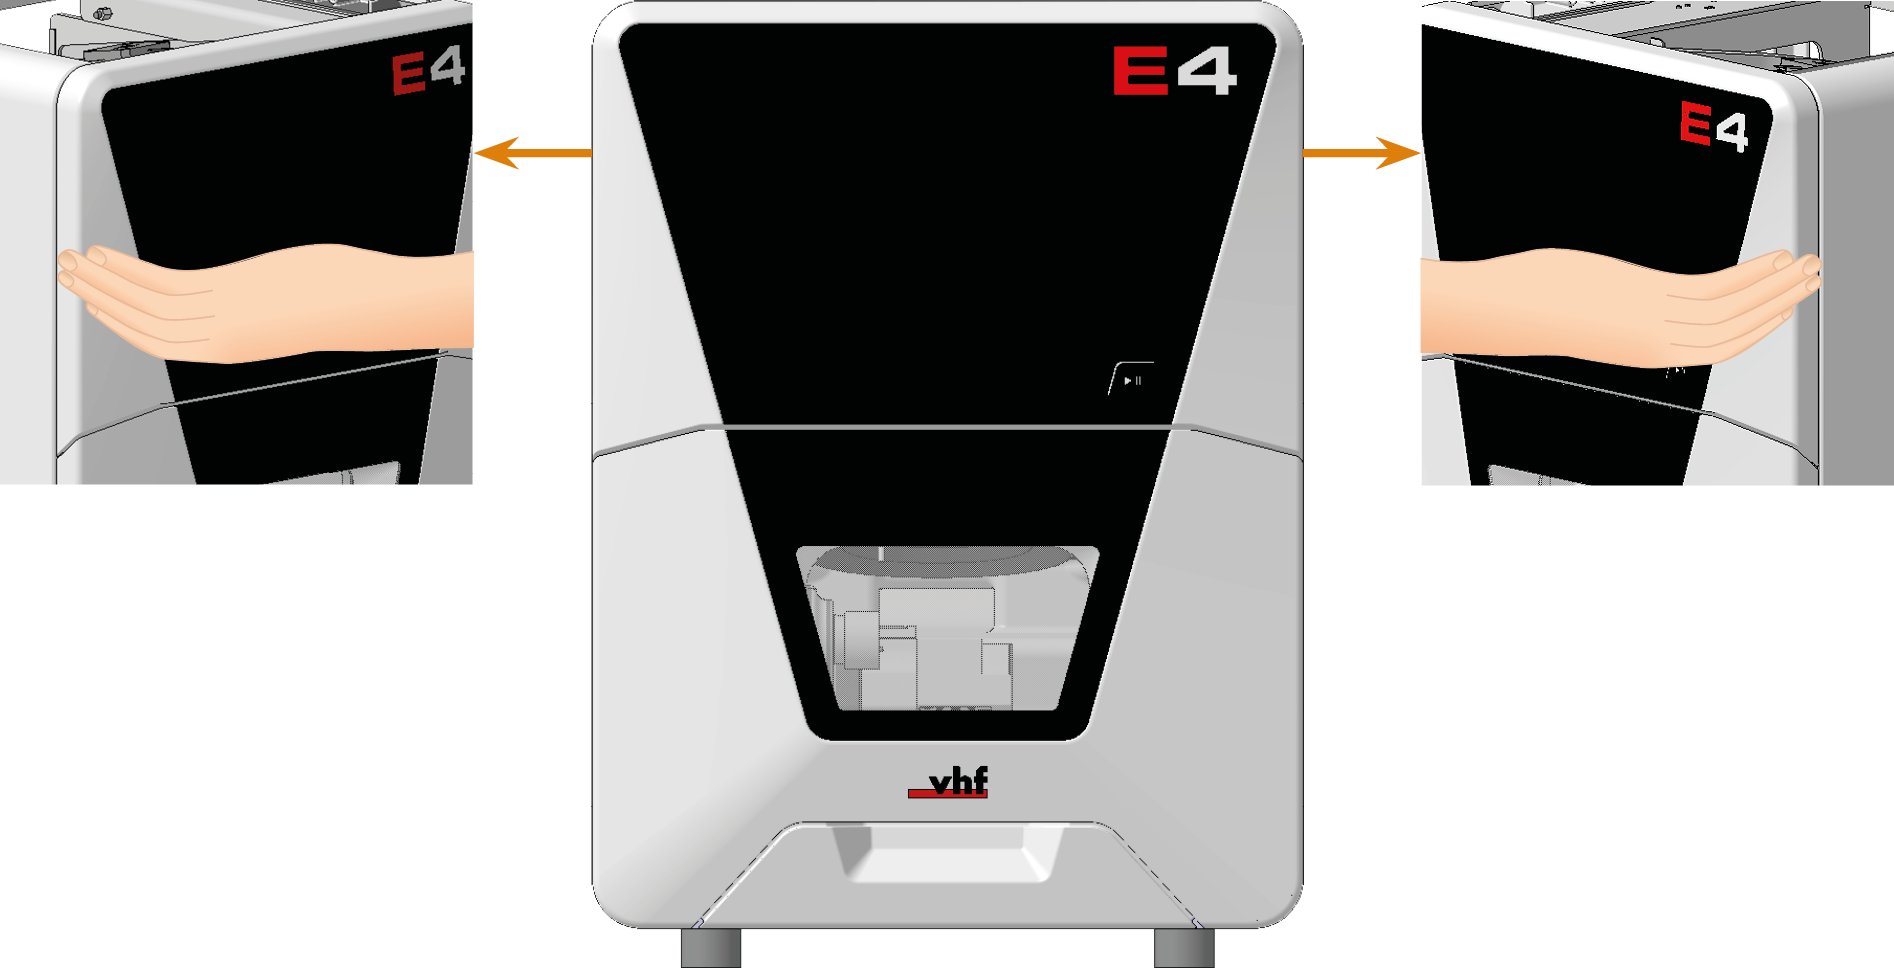
Removing and installing side panels
Removal
-
Use the wrench to loosen the 3 screws (marked orange) on the side panel that you want to remove.
-
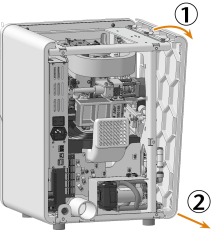
Tilt the side panel outward.
-
Slide the side panel to the rear out of the machine.
-
Remove the side panel.
Installation
-
Install the service cover.
-
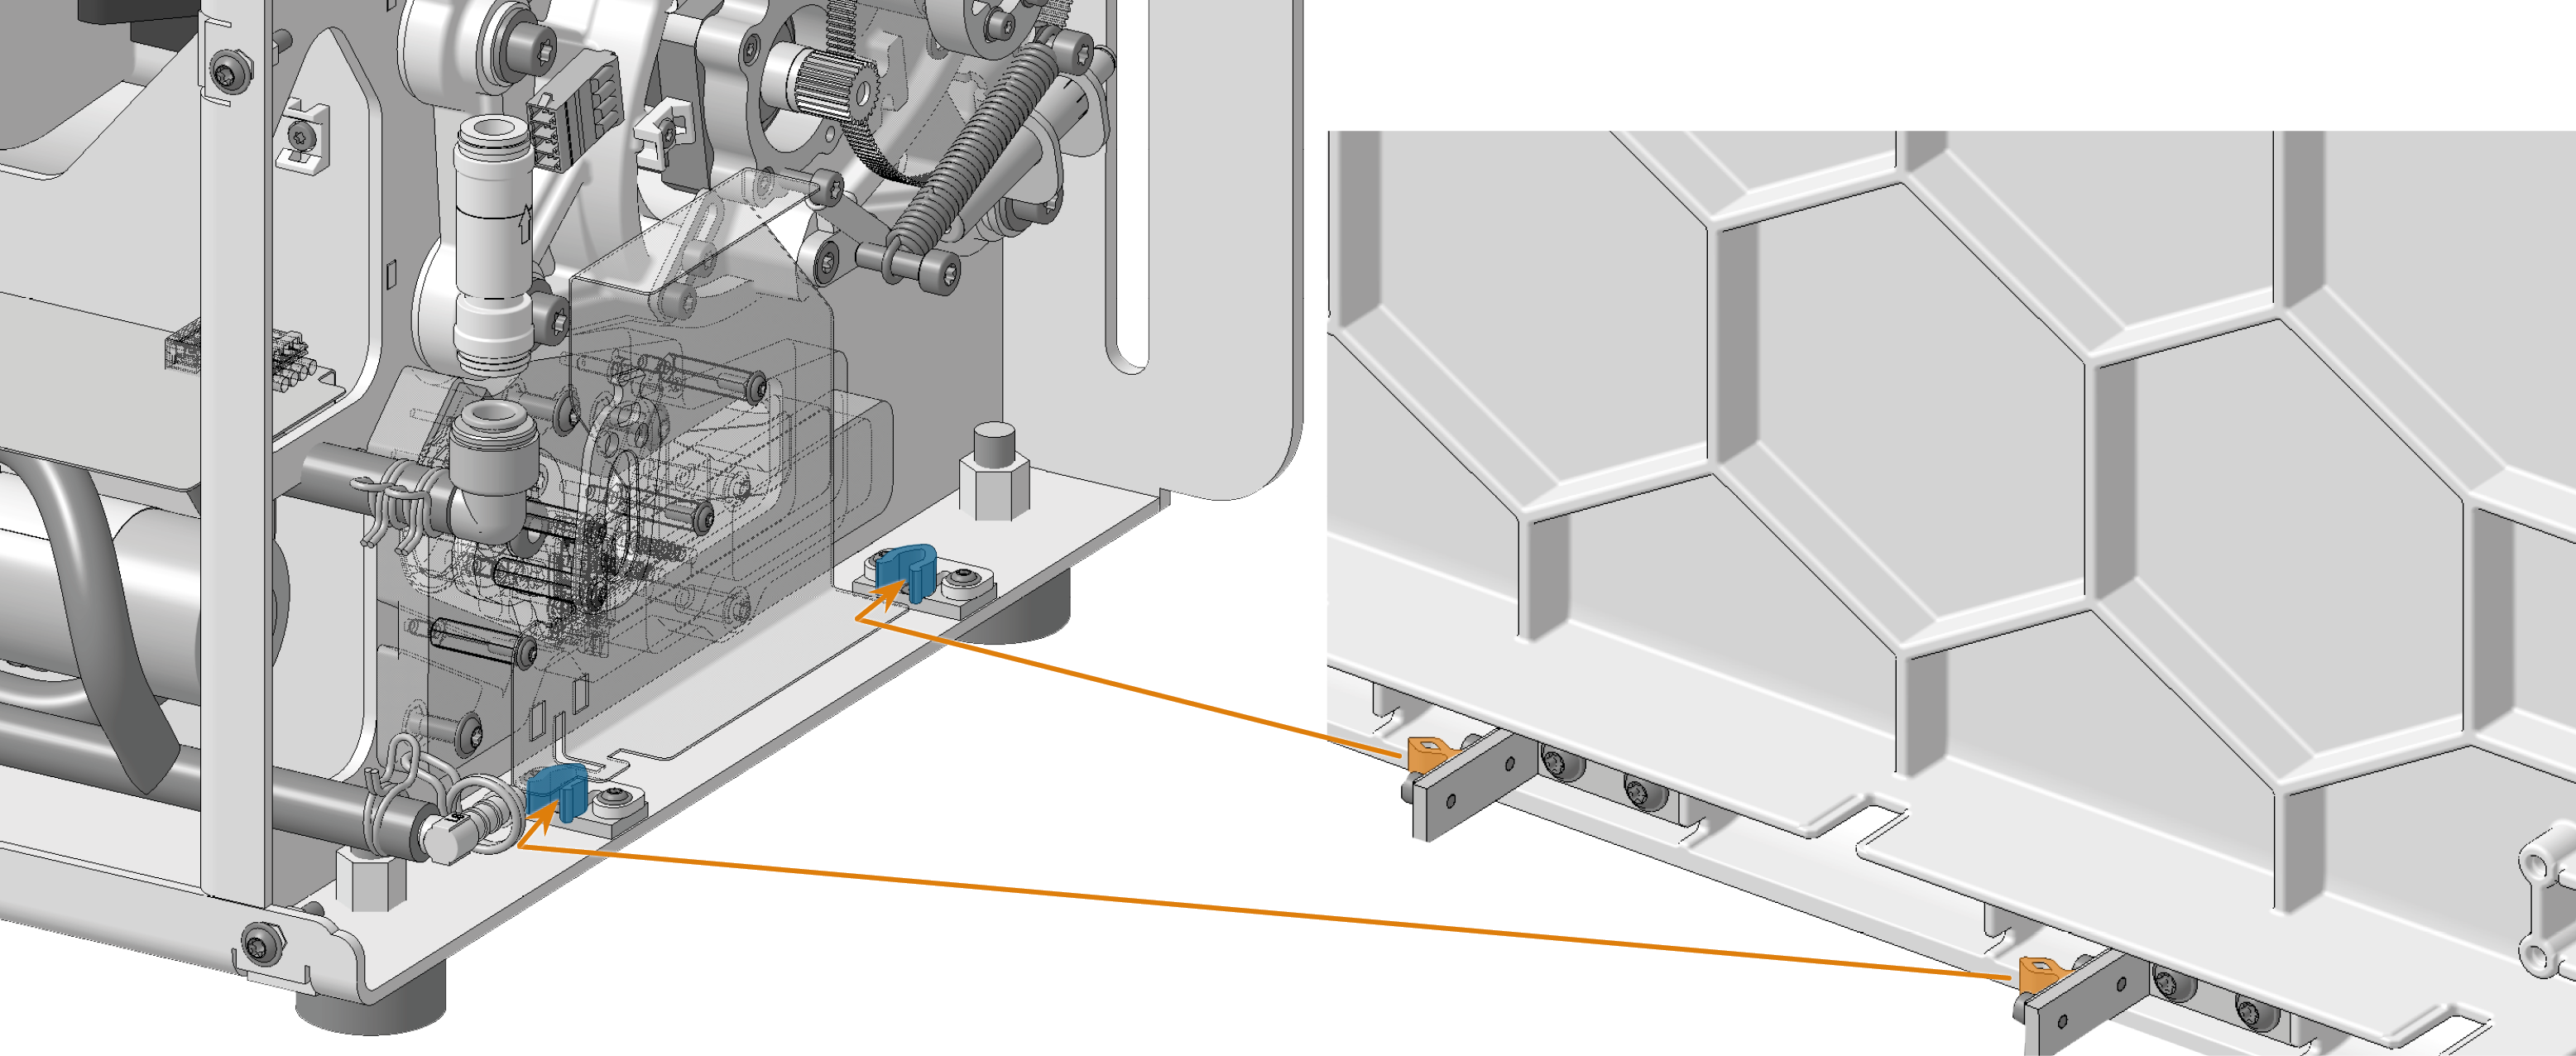
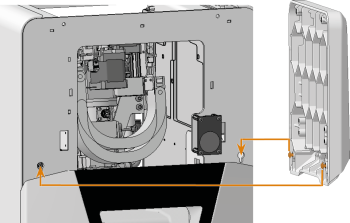
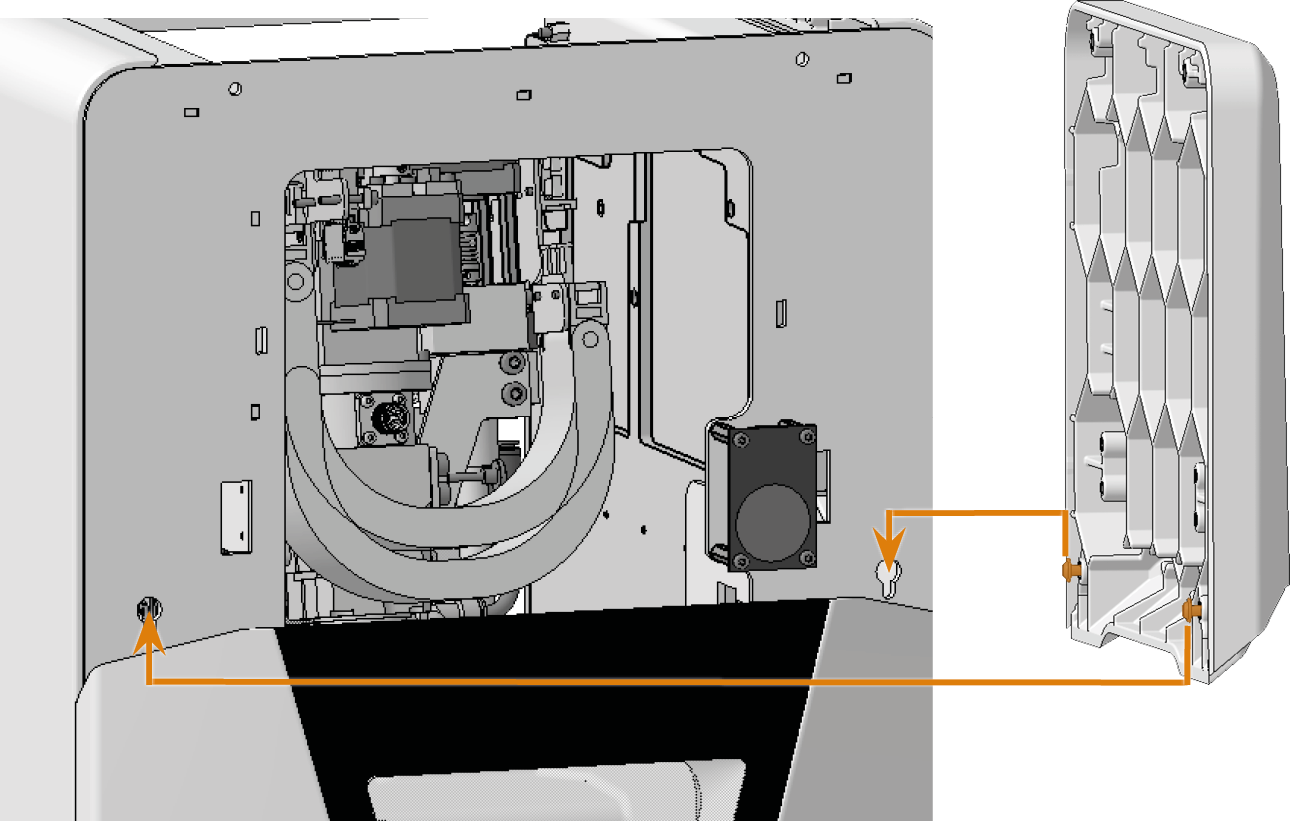
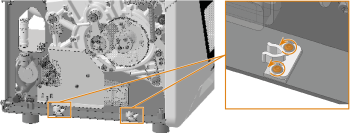
If you exchange the housing, also exchange the bushings of the fixing latches on both sides on the machine body:
-
Loosen the 2 screws and remove the sockets and screws from the machine.
-
Screw on the spare sockets in the same position. Use the screws from the spare item.
-
-
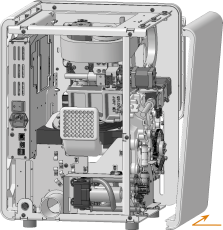
Place the side panel you want to install at the bottom of the machine. Make sure that the top edge is tilted slightly outwards.
-
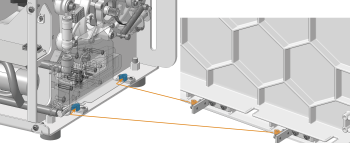
Slide the side panel cover towards the front of the machine until the connectors (marked orange) snap into the sleeves (marked blue) of the fixing latches.
-
Move the upper edge of the side panel towards the machine until the screws are in place in the recesses.
-
Lightly tighten the front and rear screws (marked orange) with the wrench. Make sure that the side panel can still be moved. Do not tighten the middle screw.

-
If the other side panel was removed, install it in the same way.
-
Slide the top cover carefully to the front of the machine. Make sure that the Front label on the bottom of the cover faces the front of the machine.
-
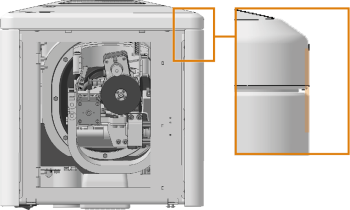
At the rear of the machine, press against the side panels from the outside to align them with the frame of the machine. Make sure that the distance (marked in orange) between the side panels and the frame of the machine is the same on both sides.
-
Tighten the rear screw (marked orange) on both sides.


-
On the front of the machine, press against the side panels from the outside and align them with the service cover. Make sure that the gap between the top cover and side panel is the same size in all places.


-
Pull the top cover halfway out of the machine.
-
Tighten the front screw (marked orange) on both sides.
-
Check whether or not the top cover can be moved back and forth easily.
If not:
-
Loosen the front and rear screws.
-
Repeat the entire procedure.
-
-
Tighten the middle screw (marked orange) on both sides.


In order for you to align the side panels correctly, both side panels must be mounted. In addition, you will need the top cover.