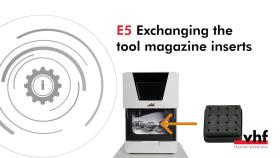
Exchanging tool magazine inserts and associated holders
Machine and tool damage if not all tools are removed
dentalcnc always drills holes in all tool magazines in the working chamber.
If a tool remains in the working chamber, a collision will ensue.
-
Always remove all tools from the working chamber when exchanging inserts.
-
Always exchange all inserts together.
Watch the video
YouTube video – When viewing this video, personal data is sent to YouTube, LLC, USA. Privacy statement
New inserts are delivered without holes for the tools. The holes must be drilled into the inserts with the machine.
In case of a defect, you can replace the holders for the inserts separately.
-
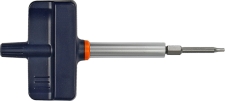
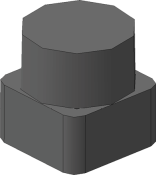
Have ready:
If you want to exchange the inserts:
If you want to exchange at least one of the holders:
-
Quit dentalcnc.
-
Open the working chamber door.
-
Switch off the machine at the main power switch.
-
CAUTION!Wear gloves.
-
NOTICE! Remove all tools from the tool magazine and remove the AirTool from insert E1.
-
If the screw to the right of the AirTool insert E1 is covered with a cover cap, remove the cover cap with a pointed tool.

-
Remove the screw on the right side of the AirTool insert E1.
-
Pull the holder out of the opening with the insert pointing upwards.
-
Push the insert out of the holder.
-
Get the required spare parts.
-
Press the AirTool insert into the rectangular opening of the holder.
-
Insert the holder into the opening and screw it down.
-
The top of the AirTool insert is 1 mm above the surface of the A-B axis module.
If this is not the case, realign the insert or holder.
-
If the screw opening next to the AirTool insert was covered with a cover cap, cover the screw opening with a new cover cap.

-
Turn the A-B axis module clockwise by 35 °.
-
Unscrew the 2 screws on the tool magazine insert holder on the lower left side of the A-B axis module.
-
The holder for the tool magazine insert and the screws slide into your hand.
-
Press the tool magazine insert down out of the opening.
-
The tool magazine insert slides out of the opening into your hand.
-
Get the required spare parts.
-
Insert the tool magazine insert from below into the opening and clamp it.
Make sure that the top of the tool magazine insert is flush with the surface of the A-B axis module.
If this is not the case, correct the position of the insert.
-
Align the holder so that the screw holes are located at the front edge of the opening. Insert the holder into the opening.
-
Insert the 2 screws into the screw holes in the holder and tighten it.
-
Close the working chamber door.
-
Start dentalcnc.
- Open the Maintenance section with the following icon in the main toolbar:

-
Select the following icon of the Exchange tool magazine inserts entry:

- Follow the instructions in the documentation for dentalcnc and drill the tool positions using the provided drill bit.


